
REVIEW · KILIMANJARO LEMOSHO ROUTE
Lemosho Route 8 Days 7 Nights/Kilimanjaro Climb
Kilimanjaro is intense, but the 8-day Lemosho plan feels built for survival, not just speed. I like the way this schedule gives you an extra acclimatization cushion before summit night, including a shorter day right beforehand so you can arrive less wrecked for the midnight climb.
You’ll probably love the Lemosho approach for the variety it delivers, from rainforest muddy trails early to high, open plateau hiking around Shira and the dramatic Barranco Wall. In the reviews tied to this route, guides like Zacariah and Epa get praised for patience and encouragement, and that matters when you are slow, cold, and thinking too much at 4 a.m.
One consideration: summit day is still brutally long and starts between midnight and 2 a.m., so even with the good pacing you need to be mentally ready for sleep deprivation and heavy scree climbing.
In This Review
- Key highlights that actually matter
- Why the 8-day Lemosho route is a smarter match for your body
- Day 1: Moshi to the Kilimanjaro National Park gate, rainforest nerves and muddy feet
- Day 2: Rainforest climb to the Shira Plateau rim, steady work and dropping temperatures
- Day 3: Shira Plateau full day, gentle altitude gains and acclimatization on moorland meadows
- Day 4: Lava Tower and Arrow Glacier junctions, then down to Barranco Camp for real recovery
- Day 5: The Barranco Wall into Karanga Valley, classic scrambling with a strong support team
- Day 6: Link up to Barafu Camp, finish the South Circuit and shift into summit mode
- Day 7: Midnight summit attempt, Stella Point sunrise, then a long descent to around 3,090 m
- Day 8: Mweka descent, certificates, and the hot-shower moment you actually earn
- Price and value: what you’re paying for at $2,600 per person
- Guides and crew: where the real quality shows up
- Gear and habits: practical Kilimanjaro tips you should not skip
- Who should book this Lemosho 8-day climb?
- Should you book Lemosho 8 days, Moshi to Kilimanjaro summit?
- FAQ
- What is the duration of the Kilimanjaro Lemosho trek?
- Where does the trek start?
- What’s included in the tour price?
- What is not included?
- Is pickup offered from Moshi?
- How much should I tip the guide and crew?
- Is free cancellation available?
Key highlights that actually matter
- A quieter, pacing-friendly schedule that splits the Barranco to Barafu push into two days
- Shira Plateau acclimatization day that keeps you moving without rushing altitude gains
- Barranco Wall day where you get the classic Kilimanjaro scrambling moment, guided and supported
- Midnight-to-sunrise summit plan with a real crater-rim rest at Stella Point
- Smaller feel on paper, since this activity lists a maximum of 2 travelers
- Strong crew focus with cooks and porters who keep food, water, and logistics on track
Other ways up Kilimanjaro we reviewed
- Kilimanjaro climb by Lemosho Route (7-day)★ 5.0 · 651 reviews
- Kilimanjaro climb, Machame Route (7-day)★ 5.0 · 262 reviews
- Kilimanjaro Climbing Lemosho Route 8 Days.★ 5.0 · 186 reviews
- Climbing Kilimanjaro – Machame Route★ 5.0 · 170 reviews
Why the 8-day Lemosho route is a smarter match for your body
The Lemosho route is popular for a reason, but the biggest reason for choosing the 8-day version is how it handles the hard stretch before the summit. Summit morning is not a normal “wake up and go” moment. You start between midnight and 2 a.m., and from there it turns into the longest grind of the whole trek.
This schedule helps by giving you an intentionally lighter day just before the summit attempt. That means you still have to work, but you are less sleep-deprived than on faster itineraries. On Kilimanjaro, small advantages add up, and this one is practical.
Also, the route itself keeps changing. You’re not just repeating the same uphill slog. You move from rainforest to alpine moorland, then up to lava-tower country and crater-rim terrain. Variety helps your brain, and it helps your legs by changing the kind of effort you’re using.
Day 1: Moshi to the Kilimanjaro National Park gate, rainforest nerves and muddy feet
You’ll depart Moshi and ride about 45 minutes through mountainside villages to reach the Kilimanjaro National Park gate. Expect a waiting period while permits get issued, and it is a good moment to watch how operations are running, because on summit day you will appreciate that everything is already set in motion.
From the start, the trail in this zone can be muddy and slippery. That is not a “nice-to-have” detail. It’s a real safety issue when the ground is wet and your steps are tired. I strongly recommend trekking poles and gaiters for this section.
What makes Day 1 feel worthwhile is the early immersion in the environment. Your guide shares information about local flora and fauna and natural wildlife, and you’ll climb through rainforest scenery at lower elevations where it can still feel surprisingly alive.
Day 2: Rainforest climb to the Shira Plateau rim, steady work and dropping temperatures
Day 2 climbs from roughly 2,895 m to about 3,505 m. You’ll start with a good night’s sleep and a hearty breakfast, then leave the rainforest behind as the path angles upward.
The walking is steady and built around wide views as you approach the rim of the Shira Plateau. Temperatures begin to drop, and this is where you’ll start learning your own cold management. A warm hat and a wind layer tend to matter more than people expect.
You’re not just climbing for distance on this day. You’re climbing for adaptation. The higher you go, the less oxygen you can use effectively, so keeping a controlled pace matters. Your guide and crew typically handle the rhythm and timing, and that reduces stress so you can focus on breathing.
Lemosho itineraries worth reading next
Day 3: Shira Plateau full day, gentle altitude gains and acclimatization on moorland meadows
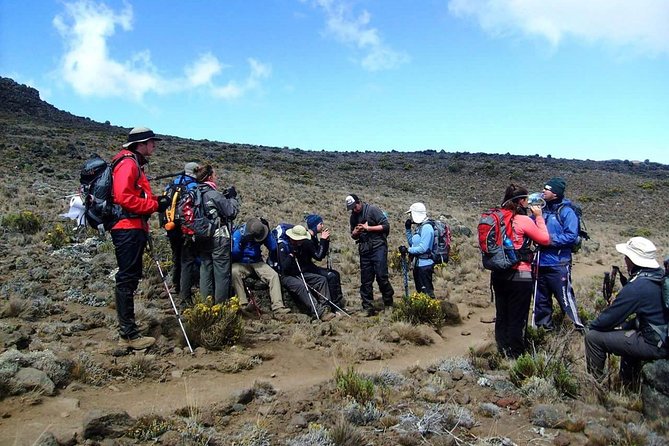
Day 3 is a full acclimatization day across the Shira Plateau area. You’ll hike roughly from 3,505 m to around 4,200 m, but the key is how you hike. The walk is described as gentle, moving east toward Kibo’s glaciered peak across the plateau.
You’ll reach Shira 2 camp on moorland meadows near a stream, then continue to Moir Hut, a less-used site near the base of the Lent Hills. This matters because acclimatization is not about staying put. It’s about moving your body while giving it time to adjust.
Moir Hut also offers options for acclimatization walks on Lent Hills, which can help you feel better before the next big day. In practical terms, this is the day you want to take slow. If you spend energy racing the altitude, you’ll pay for it later.
Day 4: Lava Tower and Arrow Glacier junctions, then down to Barranco Camp for real recovery
Day 4 runs from about 4,200 m down to around 4,000 m, and it plays an important role. Even though you end the day near where you started, the hike itself builds acclimatization by moving you through higher terrain and then bringing you back down.
The route moves east up a ridge and passes key junctions before continuing toward Lava Tower, called the Shark’s Tooth, at about 4,650 m. Shortly after, you hit another junction toward the Arrow Glacier, then descend to Barranco Camp.
This is also where you see how the route design supports you. The climb ups altitude, the descent helps you absorb it, and then the next day continues with smart pacing toward the South Circuit.
One downside to note: cold can rise fast in this band of altitude, and wind can make it feel colder even when you think you are dressed for the day. Layering helps, and so does staying in motion without overheating.
Day 5: The Barranco Wall into Karanga Valley, classic scrambling with a strong support team
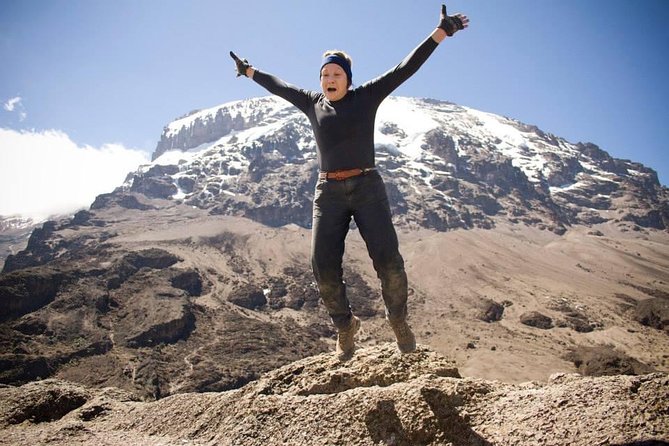
Day 5 is one of the iconic days on Kilimanjaro: the steep Barranco Wall. You’ll start around 4,000 m, hike up a ridge, then traverse toward the Karanga Valley and the junction that connects with the Mweka Trail. You end the day at Karanga Camp.
The description here emphasizes power, agility, and strength, but the practical takeaway is this: you’ll be using your balance and leg strength more than on flatter days. This is where trekking poles can really help, even if you don’t think you need them.
One of the best things in this part of the trek is how it shows the value of your crew. The cooks and porters are not just carrying gear. They also help make sure you can focus on the terrain instead of worrying about everything else.
When I look at the overall praise for this trip, this is a common thread: guides like Epa and Zacariah get singled out for keeping climbers calm and moving, especially when the wall section makes people feel exposed or tired.
Day 6: Link up to Barafu Camp, finish the South Circuit and shift into summit mode
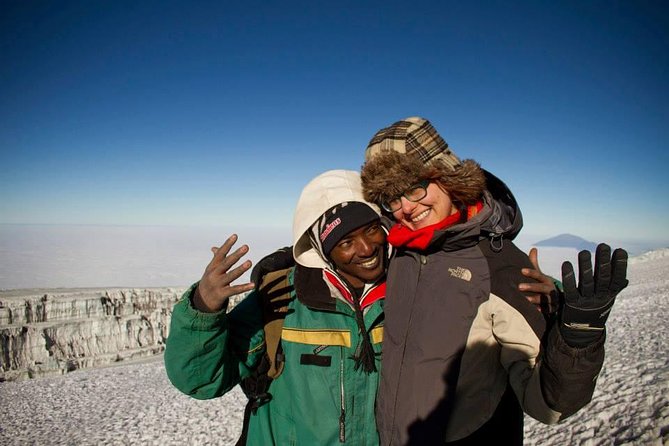
Day 6 rises from about 4,050 m to around 4,700 m and takes you toward Barafu Camp. Once you reach Barafu, you’ve effectively completed the South Circuit, which means you’re in the final approach zone and can look at the summit angles from multiple angles.
The plan calls for an early dinner and rest because tonight becomes the big one. This is where the mental part of the trek gets serious. You’ll want to sleep even if you don’t feel like sleeping, and you’ll want to treat rest like equipment, because it directly affects your summit performance.
Also note that camp life at Barafu is not about comfort. It’s about function. Warm layers, careful hydration, and following your guide’s instructions are what make the difference between coping and struggling.
Day 7: Midnight summit attempt, Stella Point sunrise, then a long descent to around 3,090 m
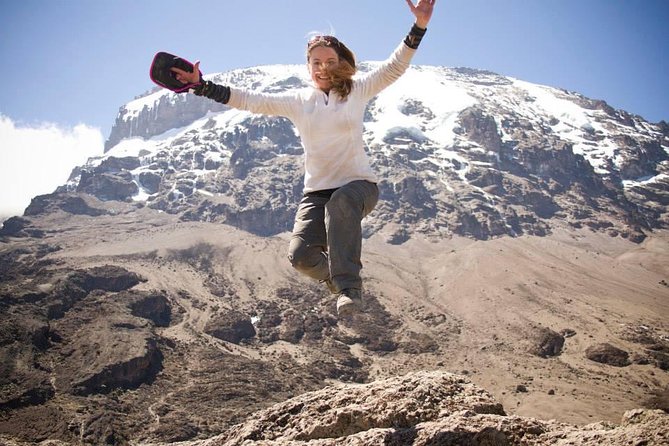
Summit night starts between midnight and 2 a.m. The trek section here is described as the most mentally and physically challenging part of the route, and that matches what most people experience on Kilimanjaro. Expect fatigue, colder temperatures, and heavy scree as you move upward.
You’ll ascend between the Rebmann and Ratzel glaciers and try to stay warm and focused. The climb is described with switchbacks in a northwesterly direction, then moving through heavy scree toward Stella Point on the crater rim at the top of your short rest.
This is where you get the payoff. You should be rewarded with one of the best sunrise moments of your whole trip during that crater-rim stop. Then, after summiting and celebrating the accomplishment, you descend to around 3,090 m (10,150 ft), which is a big altitude drop but still hard walking.
Practical advice here is boring, but it works: keep your breathing controlled, accept that your pace will be slow, and don’t burn extra energy arguing with the mountain. Summit success often comes down to how efficiently you spend effort.
Day 8: Mweka descent, certificates, and the hot-shower moment you actually earn
Day 8 drops from about 3,090 m to roughly 1,680 m. After breakfast, you’ll do a heartfelt ceremony of appreciation and team bonding with your crew, then continue down to the Mweka Park Gate for your summit certificates.
Then comes the logistics relief: a vehicle meets you at Mweka village and drives you back to your hotel in Moshi, about 30 minutes. You can count on a long overdue hot shower, dinner, and celebrations because the temperature and effort shift are dramatic here.
One more practical note for the last day: the terrain can be wet, muddy, and steep. That’s exactly when gaiters and trekking poles help again. If you’ve been relying on them up to this point, you’ll feel thankful now instead of scrambling.
Price and value: what you’re paying for at $2,600 per person
At $2,600 per person, this trek is not a budget impulse buy, but the value is in what’s included and what that means for your stress level.
Included items that directly affect your experience:
- Park fees
- Camping equipment
- Rescue fees
- Water
- Salaries for guides, cooks, and porters
- Transport to and from the mountain for you and the crew
- Crew park fees
- Certificates of achievement
- Airport transfer 2 ways complimentary
- Meals across the trek (breakfast 7, lunch 8, dinner 8)
That coverage matters because your costs are usually hidden in “small” line items on other treks. Here, you can plan more realistically, and your time goes toward hiking and resting instead of chasing paperwork.
Also, the inclusion of camping equipment and crew salaries often signals a more complete support setup. In the reviews tied to this route, people consistently praise the crew’s work in keeping things running smoothly, and that’s what you want when you are sleeping at altitude and eating on a schedule.
Guides and crew: where the real quality shows up
A strong trek is not just a route on a map. It’s how your team manages your pace, your morale, and the little problems that can snowball.
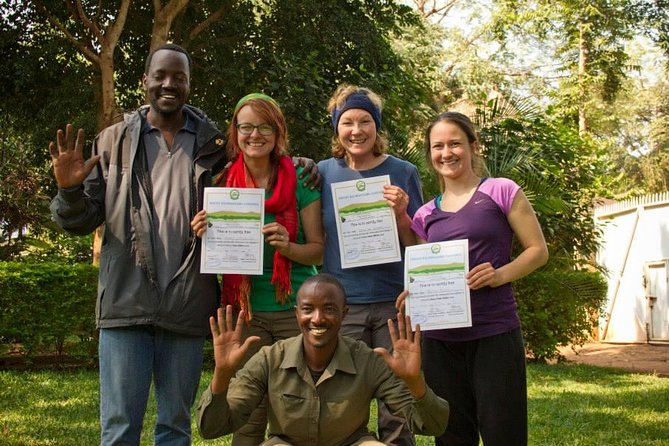
In the feedback you shared, guide names come up clearly. Amos is mentioned in connection with early coordination and communication. Zacariah gets praised for patience and encouragement. Epa appears repeatedly as a guide who helped lead climbers successfully. Other guides like Eric and Nicholas are also credited for making preparations and taking care of the climbing team.
That repeated theme matters for you because summit night is emotional as much as physical. When someone like Zacariah or Epa keeps you moving with clear encouragement, you conserve energy. You also keep your head when cold and tiredness make you question everything.
And since this trip lists a maximum of 2 travelers, you can expect less crowd pressure. That can be a big deal on narrow trails and during early summit timing when everyone is trying to function.
Gear and habits: practical Kilimanjaro tips you should not skip
Your packing list will be personal, but you can plan around the parts of the route that are specifically called out.
- Gaiters and trekking poles: recommended at lower elevations for muddy, slippery trails, and again on the wet, muddy descent at the end.
- Warm layers: you will climb into very cold conditions, especially on summit night and early morning.
- Follow the pacing plan: the altitude gains and camp placements are designed for acclimatization, not athletic bragging rights.
- Take hydration seriously: water is included, but you still need to drink and manage it consistently.
You should also know this trek is designed for people with moderate physical fitness. That doesn’t mean easy, it means realistic. If you can walk for hours at a steady pace and you take the climb seriously, you’ll be in the right zone.
Who should book this Lemosho 8-day climb?
This is a great fit if you:
- Want a schedule that prioritizes acclimatization and a shorter day before summit night
- Prefer a route with changing scenery rather than one-note uphill hiking
- Value having a strong guide and crew, especially on the hardest section
- Like the smaller feel that comes with a maximum of 2 travelers
It might be a tougher choice if you:
- Know you struggle with very early starts and long physical days
- Are not comfortable hiking on cold, exposed terrain with scree and steep sections
The good news is that the route plan supports people who pace themselves. The not-so-fun news is you still have to hike. Kilimanjaro does not care how excited you are.
Should you book Lemosho 8 days, Moshi to Kilimanjaro summit?
I’d book it if you want the kind of trek that gives you a real chance to arrive at summit night with less exhaustion, and you are willing to respect the mountain with slow, steady effort. The combination of Shira Plateau acclimatization, the thoughtful approach to Barranco and Barafu, and the described crater-rim sunrise moment at Stella Point makes this itinerary feel purposeful.
For your decision, I’d focus on two questions: Can you handle a midnight-to-early-morning start? And will you use trekking poles and gaiters where the trail turns slippery or muddy? If yes, this looks like strong value for a supported climb with experienced guides and a crew that is built around keeping you safe and moving.
FAQ
What is the duration of the Kilimanjaro Lemosho trek?
The trek runs 8 days, with about 7 nights on the mountain.
Where does the trek start?
It starts in Moshi, Tanzania, with a drive to Kilimanjaro National Park and a start time listed as 9:00 am.
What’s included in the tour price?
Park fees, camping equipment, rescue fees, water, salaries for guide, cooks, and porters, transport to and from the mountain for both travelers and the crew, crew park fees, certificates of achievement, airport transfers (2 ways) and meals (breakfast 7, lunch 8, dinner 8).
What is not included?
International flights, visas, travel insurance, and additional personal equipment.
Is pickup offered from Moshi?
Pickup is offered, and airport transfers are also listed as complimentary (2 ways).
How much should I tip the guide and crew?
Tips are recommended and listed as: Guide $15 to $20 per guide per day, Cook $10 to $15 per day, Porters $8 to $10 per porter per day.
Is free cancellation available?
Yes, free cancellation is available up to 24 hours in advance for a full refund, based on local time.
Lemosho, Compared
- Kilimanjaro climb by Lemosho Route (7-day)
★ 5.0 · 651 reviews - Kilimanjaro Climbing Lemosho Route 8 Days.
★ 5.0 · 186 reviews - Kilimanjaro climb, Lemosho Route (8-day)
★ 5.0 · 148 reviews - Kilimanjaro climb, Lemosho Route (6-day)
★ 5.0 · 129 reviews - Kilimanjaro Lemosho Route
★ 5.0 · 71 reviews
Kilimanjaro, Route by Route
- Kilimanjaro climb by Lemosho Route (7-day)
★ 5.0 · 651 reviews - Kilimanjaro climb, Machame Route (7-day)
★ 5.0 · 262 reviews - Kilimanjaro Climbing Lemosho Route 8 Days.
★ 5.0 · 186 reviews - Climbing Kilimanjaro – Machame Route
★ 5.0 · 170 reviews - Climbing Kilimanjaro through 7 days Machame Route
★ 5.0 · 151 reviews
Just added from around Moshi
Kilimanjaro Lemosho Route, compared.
 ★ 5.0Kilimanjaro climb by Lemosho Route (7-day)From $3,476651 reviews
 ★ 5.08-Day Small-group Lemosho Kilimanjaro Summit TrekkingFrom $2,895186 reviews
 ★ 5.0Kilimanjaro Climbing Lemosho Route 8 Days.From $2,300186 reviews
 ★ 5.0Kilimanjaro climb, Lemosho Route (8-day)From $3,975148 reviews
 ★ 5.0Kilimanjaro climb, Lemosho Route (6-day)From $3,034129 reviews
 ★ 5.0Kilimanjaro Lemosho RouteFrom $2,89071 reviews
 ★ 5.0Private Kilimanjaro Hike 7 Day Lemosho RouteFrom $2,45060 reviews
 ★ 5.0Climbing Kilimanjaro through 8 days Lemosho RouteFrom $2,76052 reviews
Browse the lists this tour appears in