
REVIEW · KILIMANJARO LEMOSHO ROUTE
Kilimanjaro Lemosho Route 8 Days
That first step onto Kilimanjaro is a gut-check. This 7-day Lemosho climb is built around trek high and sleep low, plus slow altitude gains that help you get to the top with less drama. I like that you also get real structure on the route, from Londorossi Gate through Shira Plateau and Lava Tower to the Barranco scrambles and the crater rim.
What I really like is the mix of big scenery and practical pacing. The day-to-day plan includes “pole pole” style hiking, and the schedule gives you time to adjust as you pass through montane forest, moorland, alpine desert, and then back down into rainforest. I also appreciate the safety setup that is spelled out clearly, from a Gamow bag and emergency oxygen to pulse oximeter monitoring and AMREF Flying Doctors for evacuation support.
One thing to consider is the commitment level. Your summit attempt day starts very early (around midnight), and the final push to Uhuru Peak involves snow-covered steps and real physical strain, with slippery sections and long downhill hiking the day after.
In This Review
- Key takeaways before you choose Lemosho
- Trek High, Sleep Low on Lemosho, Why It Matters for Altitude
- Day 1: Londorossi Gate into Lemosho Glades, Meeting Your Team
- Day 2 to Day 3: Shira Plateau and the High Desert Shift
- Day 4: Lava Tower Scramble and the Great Barranco Descent
- Day 5: The Great Barranco Wall, Glacier Views If Clouds Behave
- Day 6: Stella Point at 5685 m and the Summit Push to Uhuru Peak
- Day 7: The Mweka Rain Forest Descent, Slippery Steps and Your Finish
- Safety, Radios, and the Comfort Stuff That Actually Helps
- Price and What $3,000 Covers, Where the Value Comes From
- What to Pack and How to Train So You Feel in Control
- Who This Trek Suits Best on Lemosho
- Should You Book This Lemosho Trek with Jaribu Africa Adventures?
- FAQ
- How many days is the Kilimanjaro Lemosho route trek?
- What is the main acclimatization approach on this route?
- Where does the trek start and how are park formalities handled?
- Are meals and basic camp needs included?
- What summit points are recognized with certificates?
- What safety and medical support is included?
- What is not included that you should plan for?
Key takeaways before you choose Lemosho
- Trek-high-sleep-low design that helps you manage altitude pressure without rushing.
- Big view moments built into the route, including Lava Tower panoramas and crater-rim rest at Stella Point.
- Slow uphill rhythm with “pole pole” pacing on the longer ascent days.
- Hands-on support with radios, vital-sign monitoring, and emergency gear like oxygen and a Gamow bag.
- Comfort on the mountain beyond basics, including hot washing water, shower/wash tent, and a private flush toilet setup.
- A real team with guides and crew whose names you may hear in past departures, including Manase, Ayumwe, Stephen, and Joseph.
Other ways up Kilimanjaro we reviewed
- Kilimanjaro climb by Lemosho Route (7-day)★ 5.0 · 651 reviews
- Kilimanjaro climb, Machame Route (7-day)★ 5.0 · 262 reviews
- Kilimanjaro Climbing Lemosho Route 8 Days.★ 5.0 · 186 reviews
- Climbing Kilimanjaro – Machame Route★ 5.0 · 170 reviews
Trek High, Sleep Low on Lemosho, Why It Matters for Altitude
Kilimanjaro is high. What makes the Lemosho approach smarter is that it does not just grind upward in a straight line. The route is designed so you’ll sometimes go higher during the day, then return to a lower sleeping altitude, which can reduce the risk of altitude sickness for many trekkers.
You’ll feel that difference most on the middle sections as you move from forest into moorland and then up into alpine desert. The climb timing gives your body repeated chances to acclimatize instead of stacking altitude gains back-to-back. That is why guides often push for slower hiking, and why this itinerary leans into “pole pole,” meaning slow and steady, even when the view is calling you to hurry.
That slow pace is also a kindness for your legs. You’re not just trying to reach a summit point on a map, you’re trying to arrive with enough strength to handle technical-feeling steps like the Lava Tower rock scramble and the Great Barranco Wall.
Day 1: Londorossi Gate into Lemosho Glades, Meeting Your Team
Day 1 starts with a 4WD transfer to Londorossi Gate, where you meet your guides and mountain crew and handle the official park process. This is not just paperwork theater. The team registers climbers and weighs duffle bags so porters stay within the mandatory 20 kg limit.
After that, you drive along dirt roads through pine plantations, gradually rising toward Lemosho Glades, where your trek begins. The hiking time is moderate on this first day, about 4 to 5 hours and roughly 7 km, as you move from starting altitude around 1981 m to about 2780 m by the end of the day.
Why this matters for you: the first day is your physical warm-up plus your acclimatization intro. You learn how the pace feels at altitude, how your breathing changes, and how your camp routine will work once you stop walking for the day.
What to watch: the route specifics can shift based on weather and program. The day may include lunch at the gate depending on conditions, so keep a little mental flexibility.
Day 2 to Day 3: Shira Plateau and the High Desert Shift
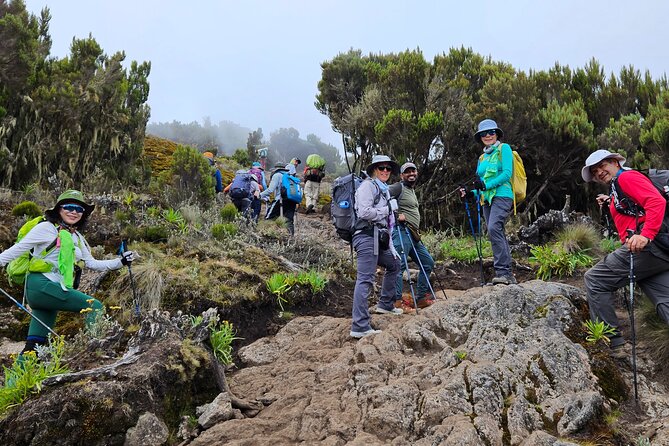
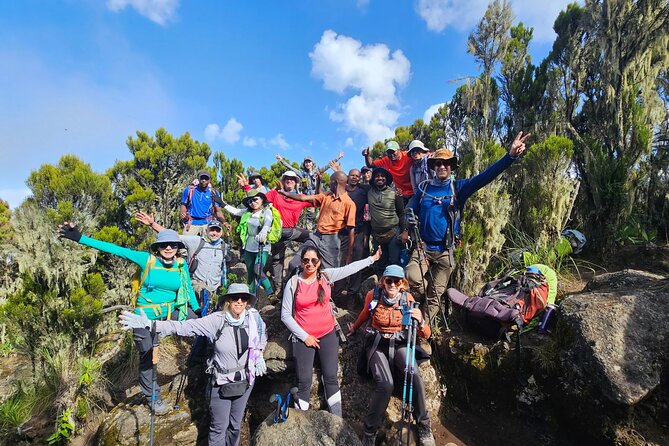
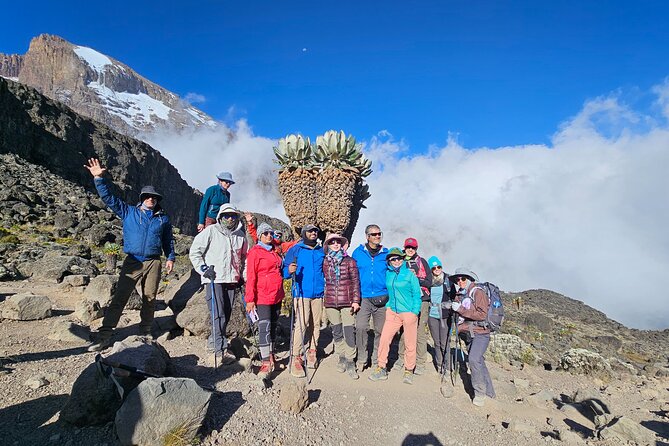
On Day 2, you’ll hike about 7 hours over roughly 12 km, with altitude rising from around 2780 m to about 3511 m. The environment transitions from montane forest into moorland. This is where you’ll see big altitude cues in the vegetation, including giant heather and erica, and then the more unusual giant groundsel and giant levelia as you gain elevation.
The plan is a long day on narrow tracks. But the itinerary makes a key choice, there is no hurry to reach camp. “Pole pole” is not a slogan here, it’s the operating system for your body. Moving slowly helps you keep breathing controlled, which is exactly what you want on days when your oxygen levels are dropping.
Day 3 is shorter in hiking time, about 5 to 6 hours and roughly 9 km, with a rise from around 3511 m to about 4175 m. This is when you shift into alpine desert. You trek through heather that thins out and then walk into harsher, drier terrain where only hardy plants survive, including small senecios and everlastings.
You’ll pass by a landmark called Shark’s Tooth and then walk up a ridge into a valley before climbing toward camp. The altitude change is still real, and you’re aiming to arrive not just tired, but acclimatized. You’re also getting scenery that feels volcanic and ancient, including views around major volcanic features such as the Lent Group, which appears near the high desert bowl area.
A practical tip for you: on Days 2 to 3, treat every uphill as a breathing exercise. Your goal is to keep your pace steady enough that you could speak in short sentences without gasping.
Lemosho itineraries worth reading next
Day 4: Lava Tower Scramble and the Great Barranco Descent
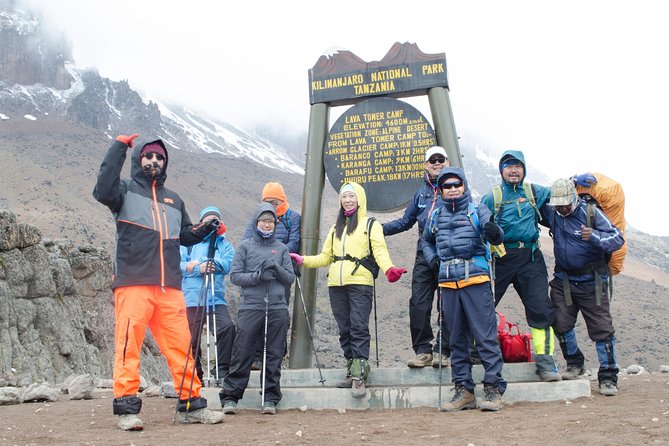
Day 4 brings the route’s signature mix of reward and effort. You’ll hike about 5 to 6 hours across roughly 6 km, moving from about 4175 m up to roughly 4642 m. The big moment here is Lava Tower around 4530 m for lunch.
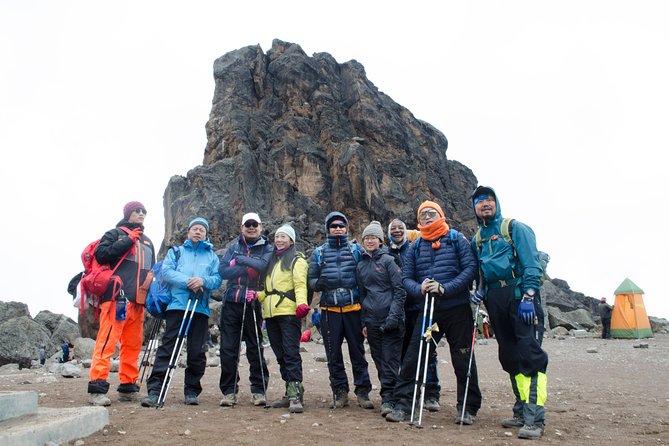
From there, you may have an optional rock scramble to the top of Lava Tower. It is described as non-technical, but it is still rock scrambling, which means hands might help and you’ll want good balance. If weather is clear, you get spectacular 360-degree-style panoramas over the Karanga Valley, Shira Plateau, and the Western Breach above.
Then you descend for about 2 hours down more than 600 m into the Great Barranco Valley. This descent is steep enough to be noticeable in your knees, but it also gives great photo opportunities and a chance to see the Western Breach from below, which looks different than it does from ridge lines.
Why I like this day for most hikers: it gives you a big payoff without requiring summit-day extremes. You’re still building altitude familiarity and confidence while doing something physical enough to feel like real progress.
Potential drawback: any scramble or rocky descent can feel rough if you go too fast. On Day 4, slow down on the rocks. You’ll thank yourself on Day 5.
Day 5: The Great Barranco Wall, Glacier Views If Clouds Behave
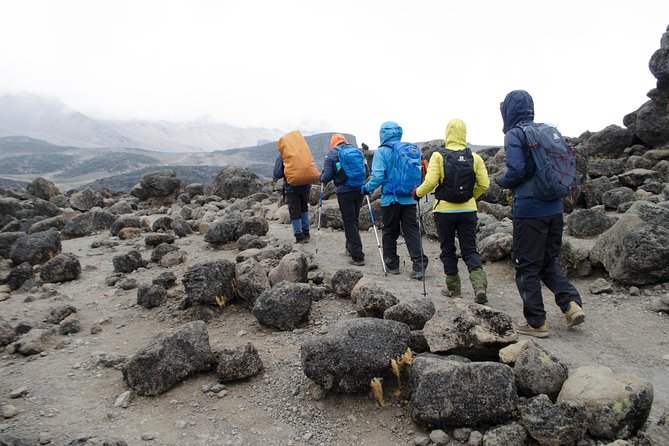
Day 5 is about 6 to 7 hours over around 9 km, from roughly 4039 m up to around 4600 m. You tackle the Great Barranco Wall, an imposing face above Barranco camp. It’s a steady climb up the eastern wall that takes you just below the Heim Glacier.
Depending on cloud cover and weather, you may get breathtaking views of the Heim Glacier and Kilimanjaro. This is one of those days where the mountain decides what it wants to show you, so keep expectations flexible.
After that wall effort, you descend into the alpine desert of the Karanga Valley. This is where temperatures can feel colder as you gain and lose exposure, and you keep moving through rugged high terrain.
The practical takeaway: the Great Barranco Wall is where many people feel the route’s personality. It is challenging but doable, and it sets you up for the final summit push by teaching your body how to work in steeper sections.
Day 6: Stella Point at 5685 m and the Summit Push to Uhuru Peak
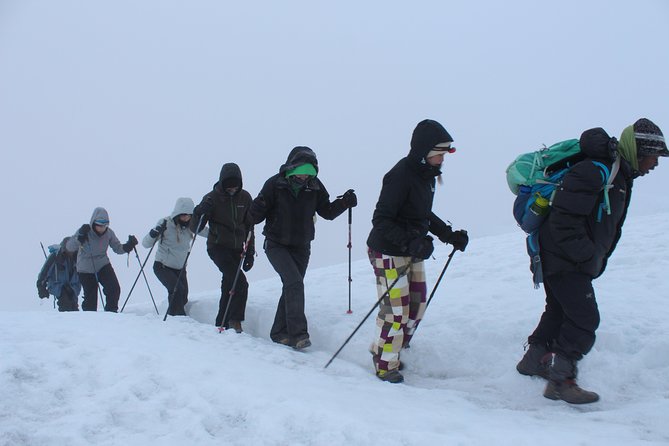
This is the day you plan for. Day 6 starts early, leaving camp at around midnight after a warm drink and light snack. The hike is listed as about 12 hours, and you’ll cover enough time that your energy strategy matters, even if the crew handles food and logistics.
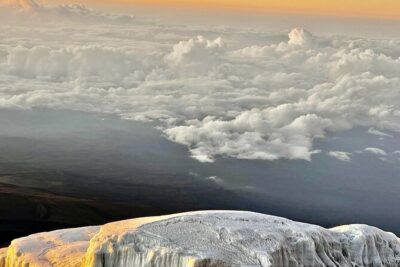
After approximately 6 hours of slow but strenuous hiking, you reach Stella Point at 5685 m. This is the rim of the main crater area, and it’s where you stop for rest, lunch, and big views over the clouds. Even without summit-level drama, the crater rim stage is emotional because it feels like you are standing at the edge of the whole Kilimanjaro story.
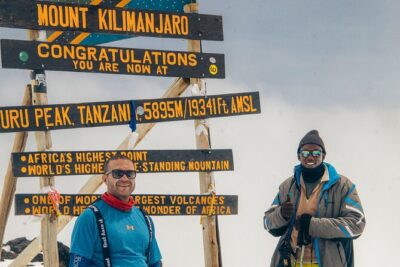
From Stella Point, the trail is normally snow-covered. The final ascent to Uhuru Peak is described as two hours and challenging. You’ll also pass by the iridescent blue Rebmann and Tarzel glaciers, and then reach Elveda Point around 5882 m where Uhuru Peak is only minutes away.
Important for you to know: summit-day pace is not about hero moves. It’s about rhythm. Short steps, controlled breathing, and staying focused on the next step rather than the top.
Also, if the day works out, this trek recognizes effort with a summit certificate system. Successful hikers receive certificates, gold for Uhuru Peak and green for Stella Point, from the Kilimanjaro National Park Authority.
Day 7: The Mweka Rain Forest Descent, Slippery Steps and Your Finish
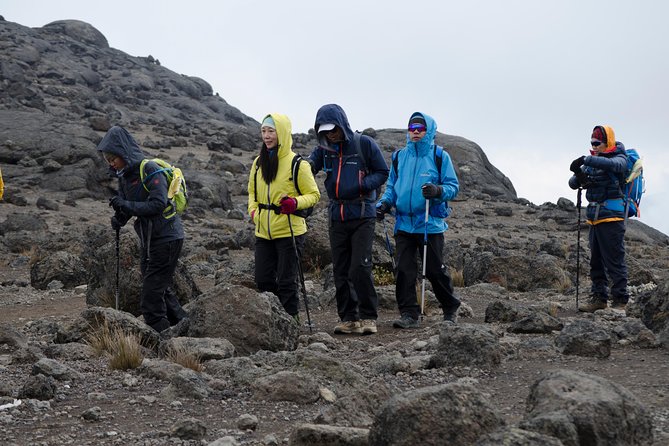
Day 7 shifts from high altitude work back into rainforest. Your hiking time is about 5 to 6 hours and the distance is around 13.5 km. You descend steeply through lush Mweka rain forest.
The description flags a key real-world issue: the trail can be slippery if wet. So wear shoes that can handle mud, take your time on steep sections, and keep trekking poles handy if you use them.
The route follows a ridge between river valleys and eventually meets a road for the final 40 minutes to the Mweka Park Gates. At that point, you stop for a well-deserved picnic lunch and receive your summit certificates.
Then you head to Arusha by private bus or Jeep, with the plan to take you to your hotel. This is when you’ll notice how quickly your body shifts from mountain mode to normal life mode, because you’ll likely feel both tired and oddly energized after seeing the forest floor again.
Safety, Radios, and the Comfort Stuff That Actually Helps
I like that the included support does not treat safety as an afterthought. You get 2-way radio communication, emergency oxygen, a Gamow bag (portable hyperbaric chamber), and comprehensive vital sign monitoring that includes a pulse oximeter. There is also an expedition medical kit and a professional guide trained as a wilderness first responder or equivalent assistance guide.
Evacuation support is also part of the package, with AMREF Flying Doctors listed for medical evacuations. That means if things go sideways, you are not relying only on luck.
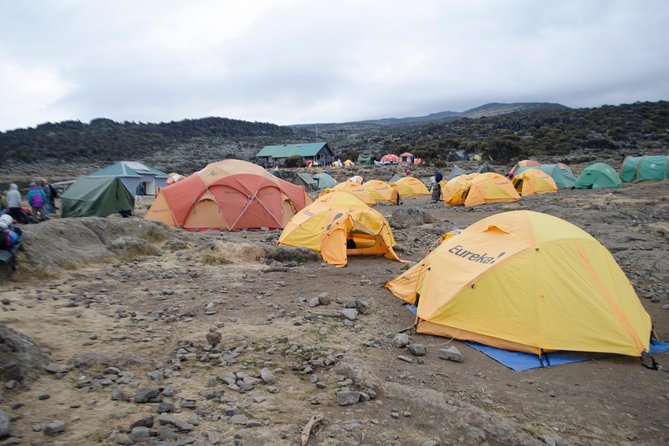
For day-to-day comfort, you also get more than the bare minimum kit. Camps include 3-person expedition tents with 2 clients per tent, mountaineering mattresses, a shower or wash tent, and a shower/wash routine that includes bowls of hot washing water morning and evening. There is also a portable tented private flush toilet setup, plus a hot steamy towel on the camp.
Food is set up for performance too. You get large portions of fresh, healthy, nutritious food, and meals are listed for breakfast, lunch, and dinner throughout the 7 days.
And yes, there’s a celebratory touch at the summit, including wine and Champagne. It’s not necessary for altitude success, but it’s a nice bookend.
Price and What $3,000 Covers, Where the Value Comes From
The price is listed at $3,000 per person, and that can look high until you break down what is included. This is not just a guide fee and a backpack shuffle.
Your package includes Kilimanjaro National Park entrance fees and rescue fees, camping or hut fees, government taxes, guide and cook staff salaries, and porter pay. You also get the gear systems that make mountain living possible, including tents, mattresses, mess tents, and even a portable toilet setup.
You’re also covered with safety tools, including emergency oxygen, the Gamow bag, pulse oximeter monitoring, and part of evacuation support through AMREF Flying Doctors. On top of that, you get airport transfers and return transfer from Arusha hotel to the park gate and back to Arusha.
You do not need to budget for international airfare, visa costs, staff gratuities, or personal trekking equipment. Those are the usual items that can still add up, but at least the core mountain costs are handled.
My take: this price is strongest for people who want fewer uncertainties. If you hate chasing permits, calculating food logistics, and wondering whether evacuation tools exist, this kind of package gives you that structure.
What to Pack and How to Train So You Feel in Control
The operator lists personal trekking equipment as not included, so plan on bringing your own. Stick to the basics that handle altitude and weather changes, including layers that work from forest humidity to alpine cold, gloves or warm headwear, and shoes with good grip for rocky steps and possible wet Mweka trails.
You also want to arrive with moderate physical fitness. That phrase matters because this route can include long hiking days, steep climbs like Great Barranco Wall, and an early midnight start on summit day.
If you’re preparing, train for endurance and steady uphill effort. And practice hiking with a pack so you can figure out how your body handles weight before you’re at 4000 m plus.
One more practical point: even with strong support, you still carry the mental workload. Take the “pole pole” approach seriously. This is not the trek for sprinting between photo stops.
Who This Trek Suits Best on Lemosho
This is a strong fit if you:
- Want a well-paced itinerary that aims for acclimatization first, not summit speed
- Like the idea of classic Kilimanjaro highlights, from Shira Plateau into the high desert to Lava Tower and Great Barranco
- Appreciate real safety tools and monitoring, not just a guide saying you’ll be fine
- Want some comfort, like hot washing water, a shower/wash tent, and a private flush toilet setup
It may not be for you if you:
- Struggle with steep scrambles and rocky descents
- Get uncomfortable with very early starts and long hiking days
- Know you need a more forgiving itinerary pace than what a summit day requires
Should You Book This Lemosho Trek with Jaribu Africa Adventures?
If you want a Lemosho climb with strong structure, I’d say it is worth serious consideration. The itinerary is built around acclimatization, and the included safety gear is clear enough to put your mind at ease. Add in the creature comforts, from hot washing water to private flush toilet setup, and the value starts to make sense beyond the sticker price.
I’d book it if your goal is to reach Uhuru Peak with a plan that tries hard to keep you healthy. I’d think twice if you know you might rush, ignore pacing, or struggle with the summit-day final push on snow-covered steps.
FAQ
How many days is the Kilimanjaro Lemosho route trek?
The duration is listed as 7 days (approx.), with the itinerary running from Day 1 through Day 7.
What is the main acclimatization approach on this route?
The route emphasizes trekking high and sleeping low, which is intended to help minimize the potential for altitude sickness.
Where does the trek start and how are park formalities handled?
You travel by 4WD to Londorossi Gate, meet your guides and mountain crew, and complete national park formalities including registering climbers and weighing duffle bags to meet porter load limits.
Are meals and basic camp needs included?
Yes. Meals (breakfast, lunch, and dinner) are included, along with camping setup items like tents, mattresses, mess tents, and washing facilities. Hot steamy towels and hot washing water are also included.
What summit points are recognized with certificates?
The trek notes summit certificates from Kilimanjaro National Park Authority, with gold for Uhuru Peak and green for Stella Point.
What safety and medical support is included?
Included items list emergency oxygen, a Gamow bag, comprehensive vital sign monitoring with a pulse oximeter, an expedition medical kit, and medical evacuations with AMREF Flying Doctors.
What is not included that you should plan for?
Personal trekking equipment is not included, and the package also lists staff gratuities, visas, international airfare, and personal expenses as not included.
Lemosho, Compared
- Kilimanjaro climb by Lemosho Route (7-day)
★ 5.0 · 651 reviews - Kilimanjaro Climbing Lemosho Route 8 Days.
★ 5.0 · 186 reviews - Kilimanjaro climb, Lemosho Route (8-day)
★ 5.0 · 148 reviews - Kilimanjaro climb, Lemosho Route (6-day)
★ 5.0 · 129 reviews - Kilimanjaro Lemosho Route
★ 5.0 · 71 reviews
Kilimanjaro, Route by Route
- Kilimanjaro climb by Lemosho Route (7-day)
★ 5.0 · 651 reviews - Kilimanjaro climb, Machame Route (7-day)
★ 5.0 · 262 reviews - Kilimanjaro Climbing Lemosho Route 8 Days.
★ 5.0 · 186 reviews - Climbing Kilimanjaro – Machame Route
★ 5.0 · 170 reviews - Climbing Kilimanjaro through 7 days Machame Route
★ 5.0 · 151 reviews
Just added from around Moshi
Kilimanjaro Lemosho Route, compared.
 ★ 5.0Kilimanjaro climb by Lemosho Route (7-day)From $3,476651 reviews
 ★ 5.08-Day Small-group Lemosho Kilimanjaro Summit TrekkingFrom $2,895186 reviews
 ★ 5.0Kilimanjaro Climbing Lemosho Route 8 Days.From $2,300186 reviews
 ★ 5.0Kilimanjaro climb, Lemosho Route (8-day)From $3,975148 reviews
 ★ 5.0Kilimanjaro climb, Lemosho Route (6-day)From $3,034129 reviews
 ★ 5.0Kilimanjaro Lemosho RouteFrom $2,89071 reviews
 ★ 5.0Private Kilimanjaro Hike 7 Day Lemosho RouteFrom $2,45060 reviews
 ★ 5.0Climbing Kilimanjaro through 8 days Lemosho RouteFrom $2,76052 reviews
Browse the lists this tour appears in