
REVIEW · KILIMANJARO MARANGU ROUTE
Best 5 Days Kilimanjaro Bike Trek Tour via Marangu Kilema Route
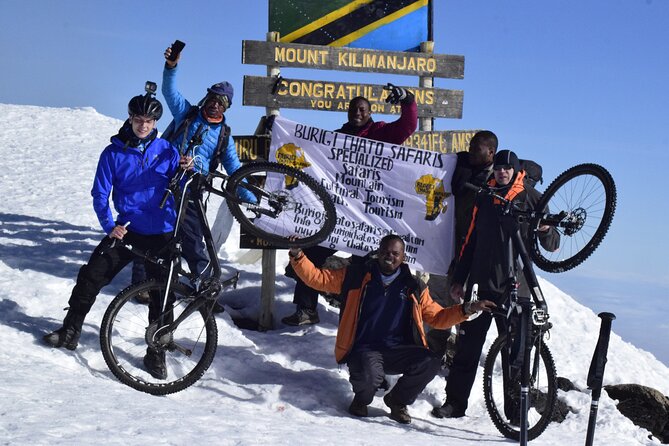
Kilimanjaro by bike sounds impossible, then it happens. On this 5-day Kilimanjaro Bike Trek via the Marangu Kilema route from Moshi, you ride the Kilema Route toward Horombo Hut, Kibo Hut, and the summit area near Uhuru Peak. I love that this is a real mountain bike challenge, not just a ride around the foothills.
I also like the way the plan mixes cycling with high-altitude timing, especially the hut stays and the early summit start. One thing to consider, though, is that this is still Kilimanjaro, with rough trail, long days, and a real chance of bike issues like tire flats plus common wildlife encounters in the wild.
In This Review
- Key Highlights You’ll Care About
- Why the Kilema Route Changes the Whole Kilimanjaro Bike Plan
- Moshi and the Gate Day Setup: Your First Big Test Is Organization
- Day 1: Kilema Gate to Horombo Hut, Building Stamina Without Burning Out
- Day 2: Alpine Desert Riding to Mawenzi Hut and Back
- Day 3: The Kibo Hut Shift, Summit Prep Starts Here
- Day 4: Summit Night, Then Bike Riding to Uhuru and Down to Stella
- Day 5: Final Descent to Kilema Gate, Then Marangu Check Out and Moshi
- Guides, Support, and How the Trip Manages Real-World Challenges
- Price and Value: What $3,292 Covers, and What Can Surprise Your Budget
- What You Should Pack and How You Should Ride Smart
- Who This Trip Fits Best (and Who Should Rethink It)
- Should You Book This Kilimanjaro Bike Trek via Marangu Kilema?
- FAQ
- What is the start time and overall duration for this Kilimanjaro bike trek?
- What’s included in the price of $3,292 per person?
- Are flights, visa, or medical insurance included?
- Do I need to bring personal climbing gear?
- Is mountain trekking bike hiring included?
- Where do the days start and where does the trip end?
- What happens if weather is poor or if I cancel?
Key Highlights You’ll Care About
- Kilema Route is the bike summit path: This route is described as the only one that allows cyclists to reach the summit area by mountain bike.
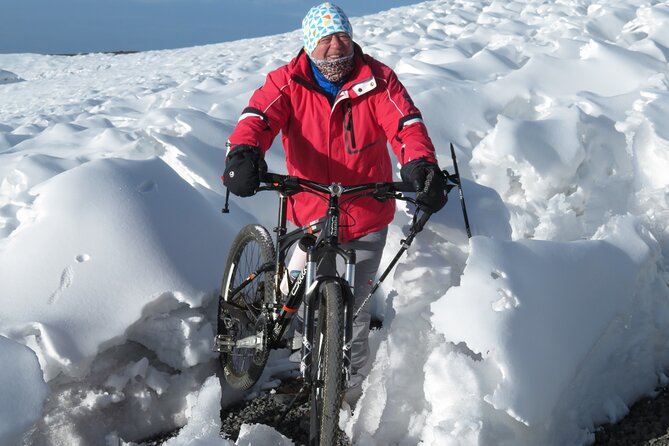
- Actual cycling time over multiple days: You ride from gate to huts, including alpine desert stretches.
- Hut stays are part of the acclimatization rhythm: Horombo and Kibo huts shape your pace for the summit push.
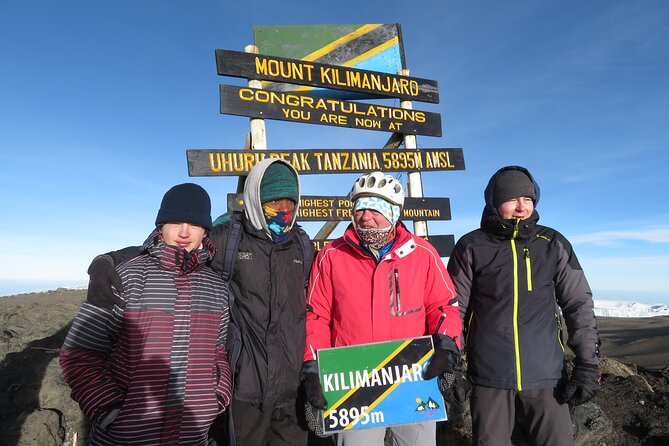
- Summit morning includes both trek and ride: You trek up early, then your bike takes over for the ride toward Uhuru Peak.
- Support is built in: Guides travel with you, and porters are involved where your bikes meet them.
Other ways up Kilimanjaro we reviewed
- Kilimanjaro climb by Lemosho Route (7-day)★ 5.0 · 651 reviews
- Kilimanjaro climb, Machame Route (7-day)★ 5.0 · 262 reviews
- Kilimanjaro Climbing Lemosho Route 8 Days.★ 5.0 · 186 reviews
- Climbing Kilimanjaro – Machame Route★ 5.0 · 170 reviews
Why the Kilema Route Changes the Whole Kilimanjaro Bike Plan
Most Kilimanjaro routes are built for foot travel. This one is built around the idea that you want to ride as much as possible, yet still get the altitude timing you need.
The Kilema route is positioned as the bike route that can reach the summit area using mountain bikes. That matters for two reasons. First, it keeps the trip aligned with the goal you booked for: riding your way up the mountain, with the summit attempt still structured around Kilimanjaro’s rhythm. Second, it means you do not spend the entire trip in a comfort-zone loop. You do real work on real ground.
You also get an important trade-off: you will not always be riding on every kilometer. There are sections where you walk while your bike and gear are managed for the next riding segment. That mix can feel odd if you picture an uninterrupted cycling grind, but it’s also what makes the plan workable.
Moshi and the Gate Day Setup: Your First Big Test Is Organization
You start in Moshi, and the plan includes transfers for you. The day begins with a pickup and then a drive to the park gates. From Marangu Gate, all hikers register at the park office, and then you continue to the Kilema Gate.
That gate sequence might sound like paperwork, but it’s actually your first “systems check.” Once you arrive at Kilema Gate, you do a final bike check and confirm you have your day-pack essentials. The details matter on Kilimanjaro. You’re expected to carry at least drinking water, your lunch pack, and extra clothing.
You’ll likely appreciate having an experienced guide with you from the first ride. In a trip like this, guides do more than point and chat. They help you pace your effort, keep the group together, and handle the small adjustments that make the difference between an enjoyable day and a miserable one.
Day 1: Kilema Gate to Horombo Hut, Building Stamina Without Burning Out
Day 1 starts at Kilema Gate at about 1,950m. From there, you begin a 16km section with your guide riding too. The goal here is straightforward: get moving, get used to the air, and reach Horombo Hut with enough energy left for the days ahead.
The riding is long enough to matter, but it’s also early in the plan, which gives you time to settle into how your legs respond. I like the way day 1 sets expectations. You’re not thrown immediately into the hardest summit-style grind. Instead, you get your first exposure to the terrain and the overall pace.
A practical drawback: even on a “starting” day, Kilimanjaro can feel slow. The air changes how your breathing works fast. If you tend to chase speed, this is the day to resist it. On a bike trek, going too hard early can come back as low energy later, right when you need it most.
Marangu, other operators and other lengths
Day 2: Alpine Desert Riding to Mawenzi Hut and Back
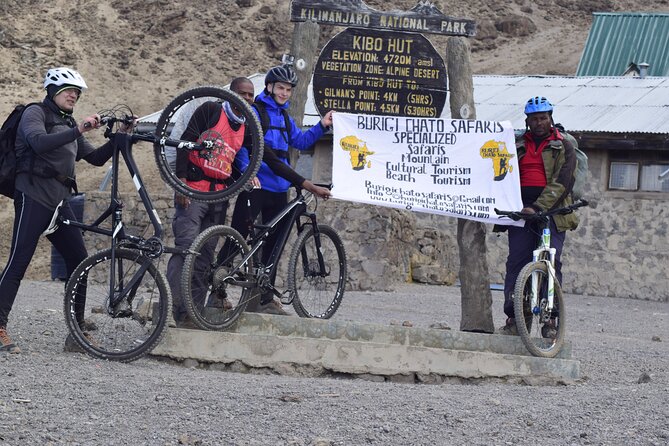
After breakfast, you cycle through alpine desert vegetation. The day is described as mostly riding, about 10 kilometers total today, with terrain that can be a mix of small stones and rougher surfaces.
You ride to the Mawenzi Hut area and then back to Horombo Hut. Even when the cycling distance feels manageable on paper, the higher altitude and the type of surface make the effort feel bigger. Alpine desert vegetation tends to be dry and exposed, and rocky ground can punish tires and wheels if you hit it carelessly.
I like that day 2 focuses on repetition. You get another chance to learn your rhythm and how your bike behaves on this kind of ground. You’re also still building toward Kibo Hut, which is where the summit plan tightens.
One consideration: if you’re used to smooth trails or road biking, this day can feel like a wake-up call. You will need patience, stable braking, and an attitude that accepts that your ride might be bumpy, slow, and more about steady effort than speed.
Day 3: The Kibo Hut Shift, Summit Prep Starts Here
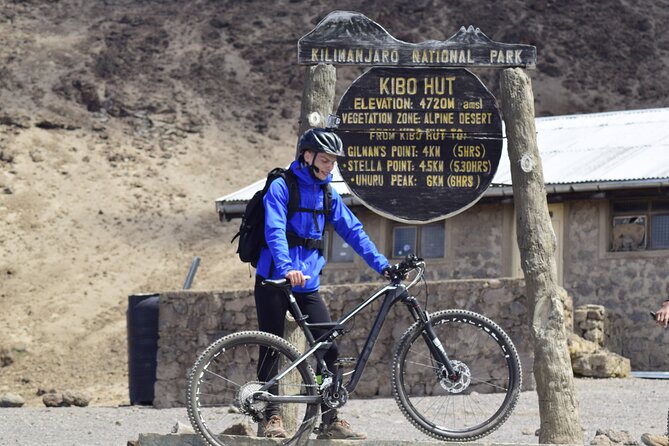
Day 3 is where the trip starts tightening around the summit. Early wake, pack duffel bags, then cycle back up toward Kibo Hut. The plan notes that the first part is shorter and the final 7km offer a biking trail.
Kibo Hut is described as a stone-built block house with bunk beds for around 60 climbers. That’s a key detail because it hints at what your night routine will be like. You’re not in a private lodge with quiet comfort. You’re in a shared alpine stop where timing, clothing, and warmth matter.
After lunch, there’s also a chance to rest. But the plan includes an option around 16:00, depending on how you feel: partially hiking up the summit path to orient yourself before the later summit attempt. I appreciate this kind of optional orientation. It can reduce uncertainty. When you’re later asked to wake up very early and climb in the dark or near-dark, knowing the general feel of the path can calm your mind.
This is also the day where you need to think ahead about gear and thermal layers. The summit climb happens the same night, so you’re moving from daytime riding into summit-condition preparation fast.
Day 4: Summit Night, Then Bike Riding to Uhuru and Down to Stella
This is the day with the most emotional payoff, and also the toughest logistics. You wake at around 4:00 am, and you start the zigzag trek up a long scree slope.
The plan gives you landmark timing. After about two hours you reach Hans Meyer’s Cave. Then the gradient gets steeper, and you continue for around another three hours to Gilman’s Point.
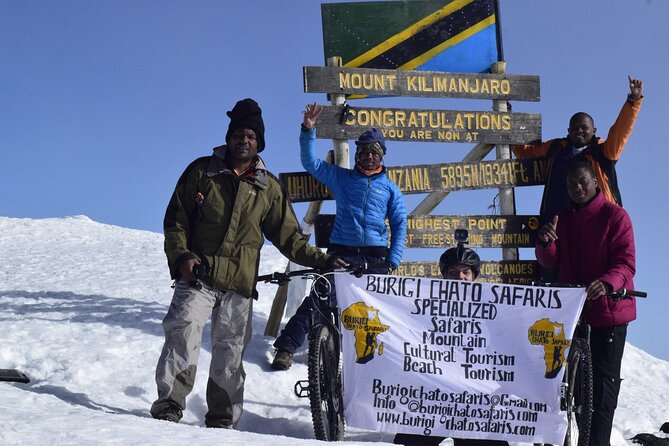
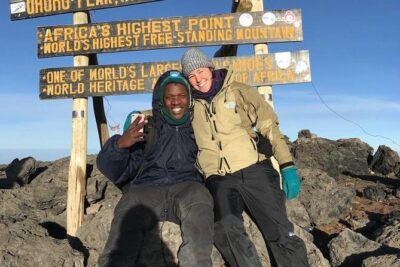
Here’s where the bike becomes the headline again. At Gilman’s Point, you take your bike from porters and ride toward Uhuru Peak. You arrive, spend a few minutes there, and then ride down toward Stella Point.
After lunch you ride down to Horombo Hut. This is the part many people don’t picture when they imagine a summit day: the descent is still physical. You’re managing your energy, keeping control, and riding terrain that can change in surface type and exposure.
The route notes also talk about vegetation and icy conditions on higher segments, including alpine desert and an icecap-like area. Even if you don’t have technical climbing gear, you still need to treat this as a cold, high-exposure environment with faster temperature shifts than you’d expect at the base.
I’ll be blunt about one likely mental trap: trying to ride too fast once the summit is close. Yes, you want to enjoy it. But you’re still at altitude, your focus is half physical and half mental, and tired hands make mistakes easier. Go steady, take photos safely, and let the descent be a controlled win, not a risky sprint.
Day 5: Final Descent to Kilema Gate, Then Marangu Check Out and Moshi
Day 5 starts with breakfast and then a final riding down to Kilema Gate. The description says the ride crosses alpine and rainforest to the Kilema Gate. That shift is one of those things you feel more than you read about, because the air and vegetation feel completely different as you descend.
Once you reach Kilema Gate, you’re transferred to Marangu Gate for check out and then driven back to your hotel in Moshi. That clean transition is a big deal. After five days in the mountains, you want a straightforward “close the trip” flow, not more wandering around trying to find paperwork and transportation.
If you’ve been pushing through fatigue all week, day 5 is where you finally get to coast a bit and absorb the fact that your legs and lungs actually did what they were asked to do.
Guides, Support, and How the Trip Manages Real-World Challenges
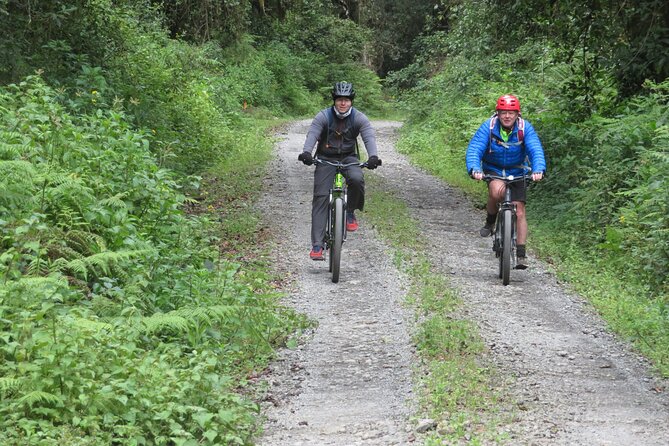
Kilimanjaro tours succeed or fail based on how well support handles the messy stuff: pace, small problems, and group movement. In the experiences you can learn from, groups can include around 16 people and may have multiple support vehicles escorting for safety. One rider also described radio communication between guides, which tells me they treat coordination as a real skill, not an afterthought.
You should still assume you will deal with wilderness basics. One rider specifically advised to expect tire issues unless you’re on a very professional setup, and to expect wildlife like rats. That might sound like a joke, but it’s also a reminder that mountain bikes in rough terrain can get flats.
What does that mean for you? Ask your operator what bike setup you’re using, what tires are fitted, and what spare parts support includes. The tour notes say mountain trekking bike hiring is not included, so you’ll want to confirm whether you’re bringing your own bike or arranging the bike separately. Don’t treat this as a last-minute detail.
Also note the trip requires moderate physical fitness. Cycling helps, but you still need to handle cold mornings, long walking segments, and the reality that altitude slows everything down.
Price and Value: What $3,292 Covers, and What Can Surprise Your Budget
At $3,292 per person, this is not an entry-level Kilimanjaro experience. The value comes from what’s included.
Included items are substantial:
- Private transportation for gate transfers, plus airport pick up and drop off
- Experienced tour guide
- Hotel accommodation before and after the trek
- All fees and taxes
- Meals: lunch 5 times, dinner 4 times, breakfast 4 times
Those inclusions reduce the “mystery costs” that often hit Kilimanjaro travelers, especially around park fees and internal logistics. Having hotel nights handled also helps you start the climb with less stress.
But there are also clear non-inclusions that can change the real cost:
- Local and international flights
- Visa
- Medical insurance
- Personal climbing gears
- Mountain trekking bike hiring
If you do not already own a suitable bike or gear, your total budget may rise fast. This is one reason I like reviewing the package this way. You can decide whether you’re truly paying for a complete plan, or paying for a plan plus equipment.
If you want the simplest budget path, price out:
1) your flights and visa,
2) medical insurance you trust,
3) personal cold-weather layers and any required clothing,
4) the bike situation.
Then compare that all-in number to what other Kilimanjaro packages include.
What You Should Pack and How You Should Ride Smart
The tour data doesn’t list a full packing list, but it does give you direction on what matters most. You’ll carry a day-pack with drinking water, lunch pack, and extra clothing. Thermal clothing is specifically called out for the summit night segment, which tells you cold will be part of your reality.
On the bike side, the most useful practical idea is to treat tires and wheels as your priority. If rough scree and rocky sections are in the plan, you want your setup to handle it. The experiences include advice about expecting flats unless your bike is top tier, so you should plan to prevent problems where possible and handle them if they happen.
A simple riding strategy I recommend on this kind of route:
- Don’t chase speed early in the week.
- Keep braking gentle on stone and scree to avoid skidding.
- When you’re tired, focus on line choice, not force.
Also, the plan is described as low impact. That aligns with how you should ride and move. Avoid riding recklessly just to “make time.” You’re there to summit safely and enjoy the mountain in the way this route allows.
Who This Trip Fits Best (and Who Should Rethink It)
This is best for people who:
- can handle moderate physical fitness and long days,
- are confident riding a mountain bike on rough ground,
- want the unique thrill of riding as part of a summit attempt,
- like structured altitude acclimatization with hut stays.
You might rethink it if you:
- only feel comfortable on smooth trails and not rocky slopes,
- expect a simple guided bike ride with no walking,
- don’t want early wake-ups, cold mornings, and summit-night preparation.
Should You Book This Kilimanjaro Bike Trek via Marangu Kilema?
I’d book it if you want a Kilimanjaro summit experience with the bike as a real part of the story, not a side activity. The route’s purpose, the hut-based acclimatization, and the summit plan that includes riding from your staging point make it a rare option.
Don’t book it on autopilot. Confirm the bike situation because mountain trekking bike hiring is not included. Also, make sure you genuinely match the moderate fitness requirement and you’re ready for the summit night cold and early start.
If your goal is to challenge yourself, ride through alpine desert conditions, and still come home with the summit achievement, this is the kind of trip that makes Kilimanjaro feel personal. If you’re less confident about bikes on rough terrain or altitude basics, pick a foot-focused itinerary first, then come back for the bike challenge later.
FAQ
What is the start time and overall duration for this Kilimanjaro bike trek?
The tour starts at 8:00 am, and the duration is listed as approximately 5 days.
What’s included in the price of $3,292 per person?
The package includes private transportation for gate transfers and airport pick up and drop off, an experienced tour guide, hotel accommodation before and after the trekking portion, all fees and taxes, and meals (lunch 5 times, dinner 4 times, breakfast 4 times).
Are flights, visa, or medical insurance included?
No. Local and international flights, visa, and medical insurance are not included.
Do I need to bring personal climbing gear?
Personal climbing gears are not included, so plan to bring what you need for the mountain conditions.
Is mountain trekking bike hiring included?
No. Mountain trekking bike hiring is not included.
Where do the days start and where does the trip end?
The trip starts with pickup in Moshi and transfers through the gates area. It ends back at the meeting point after you ride down to Kilema Gate, transfer to Marangu Gate for check out, and then go to your hotel in Moshi.
What happens if weather is poor or if I cancel?
This experience requires good weather. If it’s canceled due to poor weather, you’ll be offered a different date or a full refund. There is free cancellation, and you can cancel up to 24 hours in advance for a full refund.
The Marangu Trail
- Kilimanjaro climb, Marangu route (6-day)
★ 5.0 · 72 reviews - Climbing Kilimanjaro – Marangu Route
★ 5.0 · 65 reviews - Best Kilimanjaro Adventures 6 Days Marangu Route Experience
★ 5.0 · 18 reviews - Kilimanjaro Private Climbing in 6 Days Marangu Route
★ 5.0 · 16 reviews - 6 Days Climb Kilimanjaro Through Marangu Route
★ 4.5 · 15 reviews
Kilimanjaro, Route by Route
- Kilimanjaro climb by Lemosho Route (7-day)
★ 5.0 · 651 reviews - Kilimanjaro climb, Machame Route (7-day)
★ 5.0 · 262 reviews - Kilimanjaro Climbing Lemosho Route 8 Days.
★ 5.0 · 186 reviews - Climbing Kilimanjaro – Machame Route
★ 5.0 · 170 reviews - Climbing Kilimanjaro through 7 days Machame Route
★ 5.0 · 151 reviews
Just added from around Moshi
Kilimanjaro Marangu Route, compared.
 ★ 5.0Kilimanjaro climb, Marangu route (6-day)From $2,90272 reviews
 ★ 5.0Climbing Kilimanjaro – Marangu RouteFrom $2,00465 reviews
 ★ 5.0Private Full Day Hiking Experience to Marangu RouteFrom $26061 reviews
 ★ 4.5From Arusha/Moshi: Kilimanjaro Hike Marangu Route Day TripFrom $10154 reviews
 ★ 5.0Mount Kilimanjaro Day Hike Through Marangu Route to Mandara HutFrom $26537 reviews
 ★ 5.0Kilimanjaro Climbing 5 days Marangu routeFrom $90022 reviews
 ★ 5.0Best Kilimanjaro Adventures 6 Days Marangu Route ExperienceFrom $1,00018 reviews
 ★ 5.0Kilimanjaro Private Climbing in 6 Days Marangu RouteFrom $2,00016 reviews
Browse the lists this tour appears in