
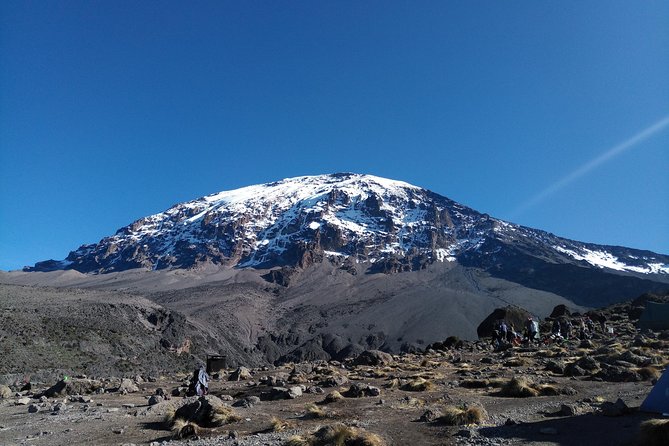
REVIEW · KILIMANJARO LEMOSHO ROUTE
7 days Lemosho route Climbing Mt.Kilimanjaro
A crater sunrise starts around 2 a.m. That is the rhythm of this Mt. Kilimanjaro Lemosho climb from Moshi, where you move through rainforest, moorland, and alpine desert on the way to Stella Point and Uhuru Peak. I love how the route uses time for acclimatization, not just mileage, and I also like that the trip takes care of the big logistics like transfers, park fees, and your daily meals.
One thing to plan for: this is not a casual hike. You’ll need strong physical fitness, and Day 6 begins in the early hours, with cold, altitude, and a long, demanding summit push.
In This Review
- Key highlights to pay attention to
- Entering Kilimanjaro via Londorossi Gate and the rainforest trail
- Day 2 and Day 3 on the Shira Plateau, where Kibo shows up early
- Lava Tower, Arrow Glacier junction, and Barranco Hut for real acclimatization
- Karanga Valley to Barafu Hut, finishing the South Circuit with summit angles
- The midnight push: Stella Point sunrise and reaching Uhuru Peak
- Day 7 down to Mweka Park Gate for certificates, then back to Moshi
- Price and logistics: what $2,850 covers and why that matters
- The crew makes the difference: names you might meet and the support you’ll feel
- What to pack and how to dress when the temps swing
- Who this trek suits best, and who should think twice
- Should you book this 7-day Lemosho Kilimanjaro climb?
- FAQ
- What time does the trek start?
- Where do you begin the climb?
- How many days is the Kilimanjaro trek?
- How big is the group?
- What meals and drinking water are provided?
- What is included in the price?
- What is not included?
- What should I expect on the descent day?
Key highlights to pay attention to
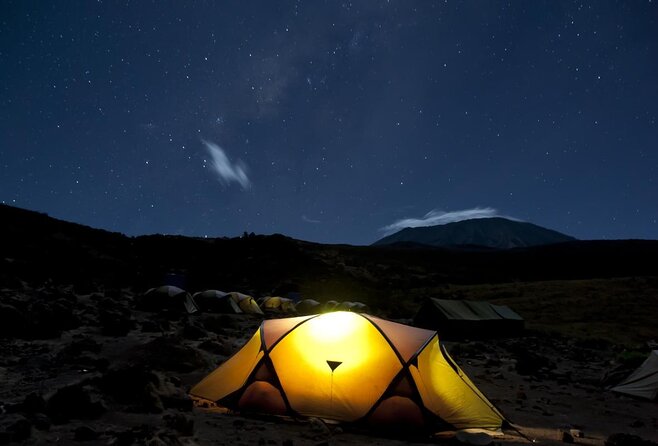
- Londorossi Gate start: a long drive from Moshi, entry formalities, then your first hike through rainforest on day one
- Shira Plateau acclimatization: big Kibo views and a full day exploring before you go higher
- Lava Tower and Arrow Glacier junction: a memorable route section before dropping to Barranco Hut
- South Circuit approach on Day 5: Barafu Hut night prep with summit angles of both Mawenzi and Kibo
- Stella Point sunrise at 18,600 ft: a short rest at the crater rim, then the final push to Uhuru Peak
- Small group size (max 15): easier coordination with your guide team and crew logistics
Other ways up Kilimanjaro we reviewed
- Kilimanjaro climb by Lemosho Route (7-day)★ 5.0 · 651 reviews
- Kilimanjaro climb, Machame Route (7-day)★ 5.0 · 262 reviews
- Kilimanjaro Climbing Lemosho Route 8 Days.★ 5.0 · 186 reviews
- Climbing Kilimanjaro – Machame Route★ 5.0 · 170 reviews
Entering Kilimanjaro via Londorossi Gate and the rainforest trail
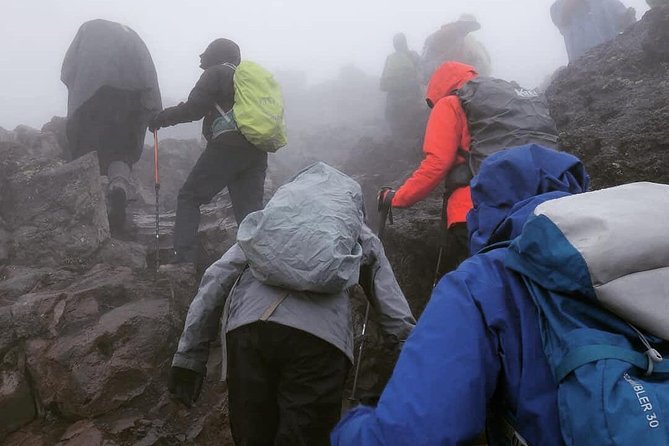
You start in Moshi and spend the morning on the move. The plan is to leave Moshi for Londorossi Gate, about a four-hour drive, where you complete entry formalities. After that, you keep driving for roughly another hour to reach the Lemosho trailhead. The stated meeting time is 8:30 a.m., so this is one of those “be ready to go” tours.
Day 1 then becomes your mental warm-up. You hike about 6 km, roughly 3 to 4 hours, through undisturbed forest. Your elevation range runs from about 7,800 ft to 9,500 ft, which is high enough to feel it but not yet the brutal altitude of the upper stages. You’ll stop for lunch after reaching the trailhead area, then settle into the rhythm of trekking and camping.
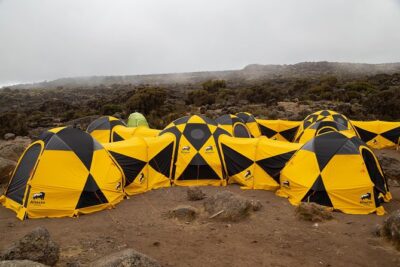
Why I like this start: the rainforest makes the first hours feel less exposed. You still get the work in, but your body starts adjusting without immediately throwing you into wind and rock. You also get a full day that ends with a normal camping setup at the first camp site, and that matters, because Kilimanjaro is as much about routine as it is about views.
Practical consideration: you’re still traveling and starting high on the same day. If you’re prone to getting travel-sore, do yourself a favor and keep your packing tight, wear comfortable footwear, and treat Day 1 as a pace-setting day, not a “go fast” day.
Day 2 and Day 3 on the Shira Plateau, where Kibo shows up early
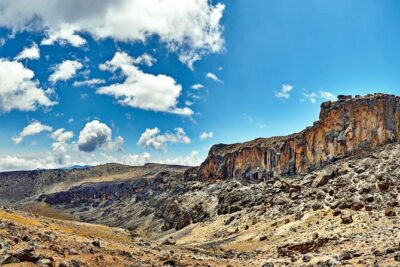
After the rainforest, the trek opens up into landscapes that feel totally different. Day 2 shifts you toward moorland: tall grasses, heather, and volcanic rock dressed with lichen. You hike around 8 km for about 5 to 6 hours, moving from roughly 9,500 ft up to 11,500 ft.
The best part on Day 2 is the moment Kibo starts appearing across the plateau. You cross several streams as you ascend through rolling hills, reach Shira Ridge, then drop gently to Shira 1 camp. That pattern, going up and then down to camp, is exactly what helps your body handle the altitude later.
Day 3 is a full exploration day on the Shira Plateau. You walk about 14 km over roughly 5 to 7 hours, staying in the moorland zone at high elevation (about 11,500 ft up to 13,800 ft). The route is described as a gentle walk east toward Kibo’s glaciered peak, across the plateau to Shira 2 camp near a stream. From there, you continue to Moir Hut, a less used site near the base of Lent Hills.
This is the acclimatization sweet spot. You get time at height, not just a fast pass through. And because Lent Hills are available for shorter walks, your guide can help you choose options that match your comfort level. If you’ve heard people say Shira is one of the highest plateaus on Earth, this is where you understand why. It’s big, open, and high.
What to watch: this is also where fatigue can creep in. You’re not necessarily hiking a steep technical trail, but you’re higher than you may expect and the air feels thin. Keep your effort steady. If you feel yourself rushing, slow down on purpose.
Lava Tower, Arrow Glacier junction, and Barranco Hut for real acclimatization
Day 4 is one of the route days that feels like a turning point. From the Shira Plateau, you continue east up a ridge, passing the junction toward the peak of Kibo. Then your direction shifts to the south east toward Lava Tower, described as the Shark’s Tooth. Shortly after, you reach another junction that brings you up to the Arrow Glacier at about 16,000 ft.
Then the day does something smart: it drops you down to Barranco Hut, around 13,000 ft. The hiking distance is about 7 km with roughly 4 to 6 hours of walking, and the habitat is listed as semi desert. This means the scenery becomes drier and more rugged looking, and your legs feel the altitude more than the trail surface.
At first glance, you might wonder why you’re “going down” after reaching such a high point. The answer is acclimatization. Your guide uses this kind of up then down pattern to help your body adapt while reducing your risk of feeling crushed by altitude too quickly.
Why this matters for you: a successful summit is not only about the final night. It’s built on days like this, where you finish with enough energy for the next stage. You rest, eat dinner, and sleep at Barranco Hut.
Lemosho itineraries worth reading next
Karanga Valley to Barafu Hut, finishing the South Circuit with summit angles
Day 5 moves you through a steep ridge section starting from Barranco. The route passes the Barranco Wall, then continues to Karanga Valley campsite. After that, you hit the junction connecting with the Mweka Trail and climb up to Barafu Hut.
This is a long day. You’re hiking about 9 km, generally 8 to 10 hours, moving from around 13,000 ft to about 15,000 ft. The habitat is described as alpine desert. That tells you what to expect underfoot and around you: less greenery, more rock and a stark feeling in the air.
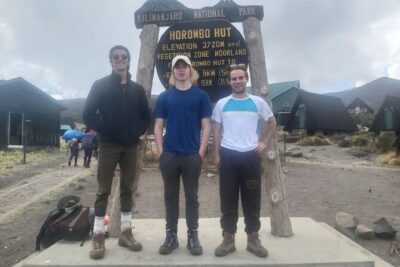
The payoff is the views. The route is described as completing the South Circuit, with summit views from different angles. From Barafu, you can see both Mawenzi and Kibo. You’re also setting up for the “big push” night, so the day has two jobs: get you positioned and get you ready.
In practical terms: you’ll want to keep your energy for the next day. Eat what’s offered. Hydrate. When it’s time to rest at Barafu, treat it like a prep day for an early wake-up, not a normal camping evening.
The midnight push: Stella Point sunrise and reaching Uhuru Peak
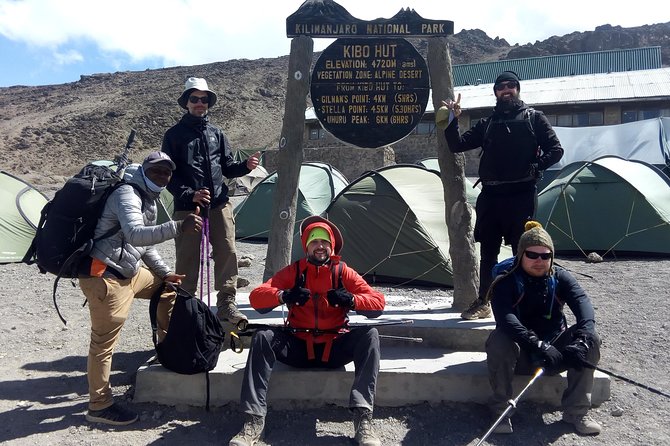
Day 6 starts early, around 2 a.m. You continue toward the summit between the Rebmann and Ratzel glaciers. You move in a northwesterly direction and ascend through heavy scree toward Stella Point on the crater rim.
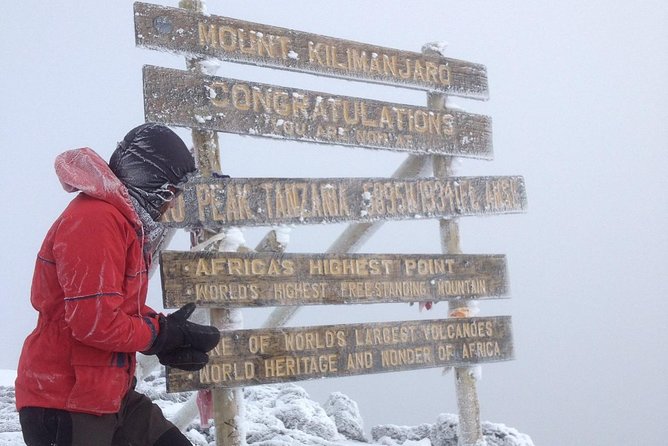
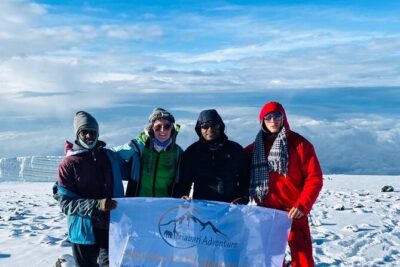
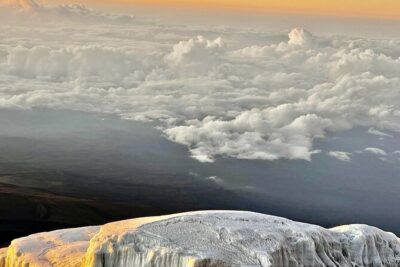
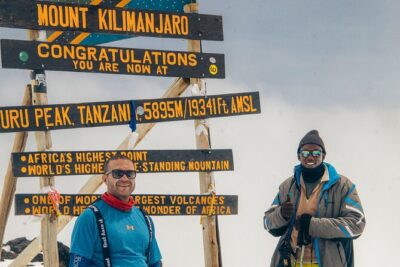
Stella Point is at about 18,600 ft. This is where you pause briefly, and if weather cooperates, you get the summit sunrise experience people talk about for years. From Stella Point, the route to Uhuru Peak takes about an hour, and the description notes that snow may be present all the way on the ascent.
Uhuru Peak is where you reach the highest point on Mount Kilimanjaro and the continent of Africa. After the summit, you descend straight down toward Mweka Hut camp site, stopping at Barafu for lunch.
This is the day that tests your attitude. Even when you’re prepared, cold and thin air slow you down. The important part is that you’re not guessing your way through the process. Your guide team is moving you along a set plan and timing, including the key rest at Stella Point.
If you want a simple mindset for Day 6: think in short segments. Rest breaks are part of the plan. Don’t judge your pace by “normal hiking pace.” You’ll feel slower. That’s normal up here.
Day 7 down to Mweka Park Gate for certificates, then back to Moshi
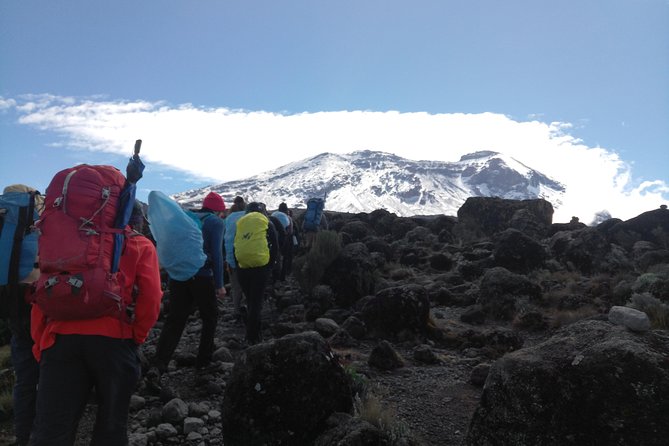
After breakfast, you keep descending. The route goes down to Mweka Park Gate, where you receive your summit certificates. From the gate, it’s about another hour to Mweka Village, and a vehicle meets you there to drive you back to your hotel in Moshi.
Day 7 covers around 10 km in about 3 to 4 hours, dropping from roughly 10,000 ft down to about 5,400 ft. The habitat returns to rainforest, and the air feels warmer, but you still might get sloppy ground conditions.
The notes for this day are honest: lower elevations can be wet and muddy. Gaiters and trekking poles help a lot with footing. Clothing gets easier. Shorts and t-shirts may be fine, but you should keep rain gear and warmer clothing handy because conditions can change quickly near the top and during descent.
This day is emotional for a lot of people, mostly because your body switches from survival mode back to normal hiking mode. Then, suddenly, paperwork happens. Certificate in hand, you can finally stop holding your breath and enjoy Moshi again.
Price and logistics: what $2,850 covers and why that matters
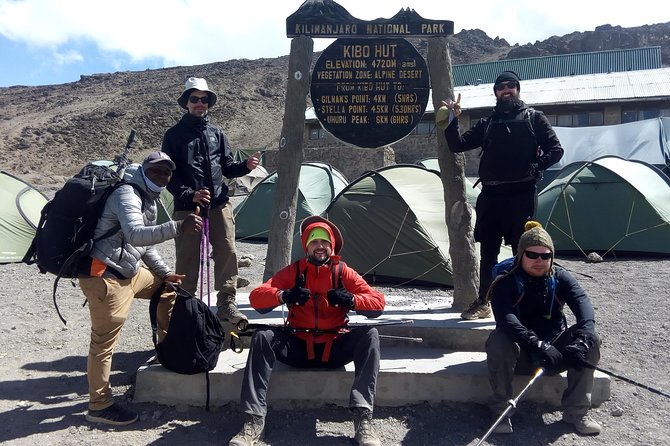
The cost is listed at $2,850.00 per person for this roughly 7-day trek. That price is not just a “guide fee.” It includes the big cost items that often get forgotten when people compare treks.
Here’s what’s included in your package:
- Private transport to and from Kilimanjaro International Airport to your accommodations in Moshi
- 2 nights accommodation in Moshi
- Park entry fees
- Team Kilimanjaro Rescue fees
- Friendly and professional mountain guides, plus cooks and porters
- Treated and filtered drinking water throughout the trek
- Emergency first-aid kit
- Meals: 7 breakfasts, 6 lunches, and 6 dinners
- Mobile ticket
Also included in the lived experience: pickup is offered, and the trek ends with a vehicle from Mweka Village back to Moshi.
What’s not included:
- Travel insurance
- Flights
- Tips for guides, porters, and cook
Now the value question: you’re paying for altitude support, not just walking time. Park entry fees and rescue fees are meaningful in a place where logistics and safety are taken seriously. Food and filtered water also reduce decision fatigue on the mountain. That can matter as much as the scenery when you’re tired and cold.
Group size is capped at a maximum of 15, so you’re not stuck in a massive herd. Smaller groups are usually easier to manage when the pace slows.
The crew makes the difference: names you might meet and the support you’ll feel
A Kilimanjaro trek is only as good as the people running it. In the feedback tied to this operator, I kept seeing the same theme: the team aims for safety and comfort, and they communicate clearly before you ever get to the mountain.
Some guide names that show up in past experiences include Bakari and Nickson, and other treks mention lead guide Goodluck Mwanga along with Abraham and Oscar. There are also references to guides FC, Matthew, and Tammy. On the operations side, Naick is mentioned as a key person in setting up trips, and Juliana appears in customer support follow-through. A cook named Yahaya and a driver named Nixon come up too.
Why I think this matters for your decision: on summit night, you don’t want a chaotic operation. You want a steady team. You want encouragement that matches the reality of altitude. Multiple experiences mention positive energy and support, including how the guide team pays attention to needs and keeps the mood up with small distractions while you hike.
Even the food gets praised. One repeated idea is that meals are plentiful. That’s not just comfort. When you’re at altitude, your body burns through calories fast, and eating consistently helps your summit chances.
A fair caution: your exact guide and crew can vary by date. But the structure is consistent, and the company emphasizes both local expertise and safety planning.
What to pack and how to dress when the temps swing
The route itself tells you clothing choices. In the upper sections, conditions can include snow, and on the last day, lower elevations can be wet and muddy.
Based on the trek notes, I’d prioritize:
- Rain gear (keep it handy, not buried)
- Warmer clothing, especially for early morning and summit time
- Gaiters and trekking poles for the descent, particularly on muddy ground
- Shorts and t-shirts might be enough at lower elevations, but treat layers as your friend
Also, consider the schedule reality. Day 6 is timed around 2 a.m. The cold and exhaustion can make small discomforts feel huge. If you dress in a way that reduces fiddling with layers while you’re moving, you’ll likely feel better.
Who this trek suits best, and who should think twice
This plan is best for people who:
- Have strong physical fitness and can handle long hiking days, including an 8 to 10 hour Day 5
- Prefer a route that uses acclimatization time, with a Shira Plateau exploration day and a dedicated acclimatization section near Barranco
- Want a fully supported trek with guides, cooks, porters, filtered water, and an emergency first-aid kit
It might be a poor fit if:
- You’re not comfortable with an early wake-up and the long summit night
- You’re not ready for altitude effort, even with the route’s built-in pacing
- You’re relying on the trip price alone, since travel insurance and tips are not included
Should you book this 7-day Lemosho Kilimanjaro climb?
If you want a classic Kilimanjaro experience with real time for acclimatization and a strong safety-minded operation, this is a solid choice. You also get a lot of practical value baked into the price: transfers, park and rescue fees, filtered water, and your main meals.
Book it if you’re fit enough for a summit night start and you like the idea of watching environments change day by day, from rainforest to moorland to alpine desert. Choose carefully if you know early morning hikes and cold, thin-air conditions are a struggle for you.
Either way, do your prep honestly. Kilimanjaro is beautiful, yes. But it rewards the kind of planning that starts before you ever reach Londorossi Gate.
FAQ
What time does the trek start?
The start time is listed as 8:30 a.m.
Where do you begin the climb?
You depart Moshi for Londorossi Gate, then you drive to the Lemosho trailhead where you start the hike.
How many days is the Kilimanjaro trek?
The trek is listed as 7 days, approximately.
How big is the group?
The tour has a maximum of 15 travelers.
What meals and drinking water are provided?
The package lists 7 breakfasts, 6 lunches, and 6 dinners, and it includes enough treated and filtered drinking water throughout the trek.
What is included in the price?
Included items are private transport between Kilimanjaro International Airport and your Moshi accommodations, 2 nights in Moshi, park entry fees, Team Kilimanjaro Rescue fees, guides plus cook and porters, an emergency first-aid kit, and the listed meals and water.
What is not included?
Travel insurance, flights, and tips for guides, porters, and the cook are not included.
What should I expect on the descent day?
On the final day, conditions can be wet and muddy at lower elevations, and gaiters and trekking poles are suggested. You then reach Mweka Park Gate for summit certificates, and a vehicle returns you to Moshi.
Lemosho, Compared
- Kilimanjaro climb by Lemosho Route (7-day)
★ 5.0 · 651 reviews - Kilimanjaro Climbing Lemosho Route 8 Days.
★ 5.0 · 186 reviews - Kilimanjaro climb, Lemosho Route (8-day)
★ 5.0 · 148 reviews - Kilimanjaro climb, Lemosho Route (6-day)
★ 5.0 · 129 reviews - Kilimanjaro Lemosho Route
★ 5.0 · 71 reviews
Kilimanjaro, Route by Route
- Kilimanjaro climb by Lemosho Route (7-day)
★ 5.0 · 651 reviews - Kilimanjaro climb, Machame Route (7-day)
★ 5.0 · 262 reviews - Kilimanjaro Climbing Lemosho Route 8 Days.
★ 5.0 · 186 reviews - Climbing Kilimanjaro – Machame Route
★ 5.0 · 170 reviews - Climbing Kilimanjaro through 7 days Machame Route
★ 5.0 · 151 reviews
Just added from around Moshi
Kilimanjaro Lemosho Route, compared.
 ★ 5.0Kilimanjaro climb by Lemosho Route (7-day)From $3,476651 reviews
 ★ 5.08-Day Small-group Lemosho Kilimanjaro Summit TrekkingFrom $2,895186 reviews
 ★ 5.0Kilimanjaro Climbing Lemosho Route 8 Days.From $2,300186 reviews
 ★ 5.0Kilimanjaro climb, Lemosho Route (8-day)From $3,975148 reviews
 ★ 5.0Kilimanjaro climb, Lemosho Route (6-day)From $3,034129 reviews
 ★ 5.0Kilimanjaro Lemosho RouteFrom $2,89071 reviews
 ★ 5.0Private Kilimanjaro Hike 7 Day Lemosho RouteFrom $2,45060 reviews
 ★ 5.0Climbing Kilimanjaro through 8 days Lemosho RouteFrom $2,76052 reviews
Browse the lists this tour appears in