
REVIEW · KILIMANJARO MACHAME ROUTE
6 Days Machame Route Kilimanjaro Trekking
Kilimanjaro starts with mud and ends with sunrise. This 6-day Machame Route is a smart middle ground: it gives big scenery shifts without stretching into a full week and a half. I like that it’s set up with real support, from professional guiding to porterage, and that your crew handles the logistics so you can focus on the climb.
What I really like is the human side. Reviews repeatedly point to smooth coordination by Erastus and lead-guide support from people like Matthew, Oliver, and Benjamin, with clear communication and pacing that helps you move at your own rhythm. I also like the structure of the hike, with acclimatization built into the itinerary, including a key stop at Barranco Hut before summit night.
One consideration: 6 days is tight if you’re slower or if you’re sensitive to altitude. There’s a long summit push in the dark, and the route still includes steep stretches and rocky footing, so you’ll want to be honest about your fitness and recovery.
In This Review
- Why the Machame Route Works in 6 Days
- The Value Question: What You Pay for, and What You Actually Get
- Moshi to the Park Gate: The Smooth Start That Sets the Tone
- Day 1 Through the Rain Forest: Mud, Slippery Trails, and First Big Climb
- Day 2: Moorland Ascents and the Shira Campsite Tease
- Day 3: Semi-Desert to Lava Tower, Then Down to Barranco Hut
- Day 4: Barranco Wall, Karanga Valley, and Camp at Barafu
- Day 5: Midnight Summit Push, Stella Point Sunrise, and Arctic Conditions
- Day 6: Fast Descent Through Rain Forest and Summit Certificates at Mweka Gate
- Guides, Porters, and Food: The Support That Makes a Difference
- What to Pack (Without Guessing Your Life Away)
- Who This Trek Best Fits
- Should You Book This 6 Days Machame Route Trek?
- FAQ
- What route is this tour using on Kilimanjaro?
- Where does the trek start and where does it end?
- What is the start time listed for the activity?
- Is transportation included?
- What meals and accommodations are included?
- What equipment is provided, and what do I need to arrange myself?
- Are park fees or rescue fees included?
- What should I do about tips?
Why the Machame Route Works in 6 Days
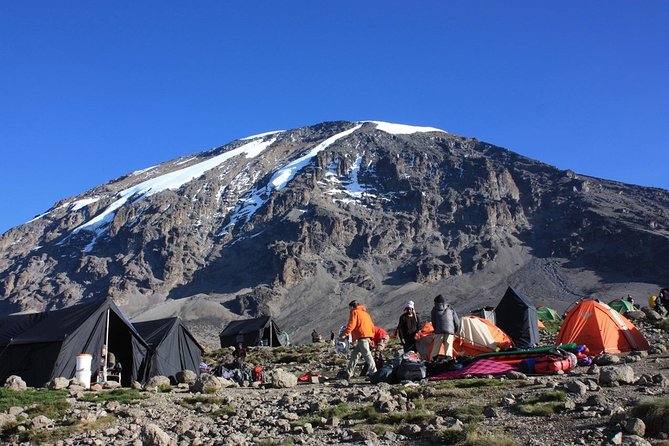
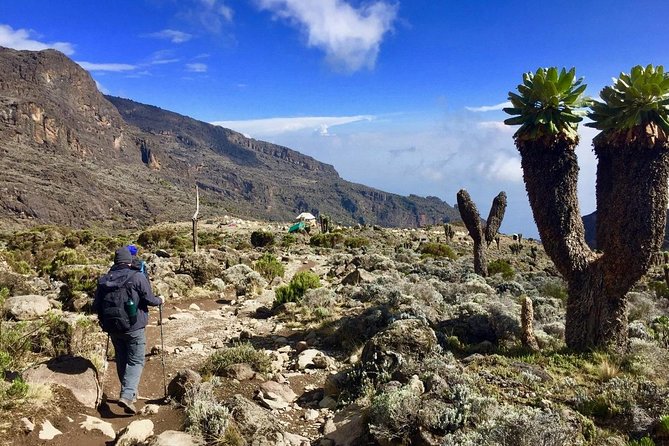
The Machame Route is popular for a reason: you get variety. You climb through rain forest, then moorland, then semi-desert, then higher alpine desert. That habitat change matters because it changes how you feel day to day. One day you’re dealing with slippery ground and humidity, the next you’re dealing with colder, drier air and stronger wind.
Machame is also known as the route of choice for many climbers, including seasoned hikers. The 6-day pacing gives you multiple acclimatization moments without turning the trek into a marathon. Your goal is to arrive at summit night as prepared as possible, not just as “ready enough.”
If you want the best match:
- You like steady hiking days with clear goals.
- You’re comfortable with cold mornings and early starts.
- You want a route with scenery variety, not only altitude chasing.
Other ways up Kilimanjaro we reviewed
- Kilimanjaro Airport taxi to/from Moshi town/Arusha town★ 5.0 · 60 reviews
- 6 Days Climbing Mount Kilimanjaro Machame Route★ 5.0 · 40 reviews
- 8 Days Kilimanjaro Hike via Lemosho Route★ 5.0 · 39 reviews
- 7-Day Machame Route Kilimajaro★ 5.0 · 28 reviews
The Value Question: What You Pay for, and What You Actually Get
At $1,930.42 per person, you’re paying for a guided, supported climb, not just a pass into the mountain. Included in the price are camping equipment (mess tent, mattress, cooking gear), parking fees, rescue fees, all accommodation on trek, professional driver/guide, and porterage. Meals are built in too: 5 breakfasts, 5 lunches, and 5 dinners.
That matters because Kilimanjaro is not cheap to run logistically. Porters and kitchen staff, campsite setup, and rescue coverage all cost money, and you avoid the scramble of sourcing gear, food, and tents yourself.
What’s not included is where you should watch your budget:
- Climbing gear rental (you can rent it)
- Sleeping bag rental (also available)
- International flights, accommodation before and after the trek
- Bath towels
- Personal items like souvenirs
- Visa and any government tax or park fee increases
- Tips
My take: if you want a guided climb with meals, camping setup, and porterage handled, this pricing can make sense. If you already own most gear and plan to do everything self-supported, you might compare options, but most people appreciate paying for a full system.
Moshi to the Park Gate: The Smooth Start That Sets the Tone
The trek starts around the Kilimanjaro area, with a drive of about 50 minutes from Moshi to the national park gate. You’ll pass through Machame village, which sits on the lower slopes. That short pre-trek drive is useful. You’re not dropped into hiking instantly, and you get your bearings before the trail work begins.
You’re also meeting at Kilimanjaro International Airport (and the activity ends back at the meeting point). The start time is listed as 12:00 am, which can feel surprising. In practice, the important thing is that summit day is run on a midnight-to-early-hours schedule, and your planning should assume very early mornings.
If your body hates early wake-ups, this trek is not for you. If you can handle it, the payoff is real: you’ll hike with fewer crowds on some days, and your summit sunrise window is protected by the early start.
Day 1 Through the Rain Forest: Mud, Slippery Trails, and First Big Climb
You begin in Kilimanjaro National Park at roughly 5,400 ft to 9,400 ft, hiking about 11 km for 5 to 7 hours. The habitat is rain forest, which means two things: the air can feel damp, and the trail can be muddy and slippery.
This is where I recommend you be practical with gear:
- Gaiters are a big help for wet, muddy sections.
- Trekking poles take pressure off your knees on uneven footing.
- If you’re thinking about shoes, prioritize grip. A slip early in the trek is not a fun way to start.
You’ll hike a winding trail up a ridge from the gate toward Machame Camp. The early section may feel like “just warm-up,” but don’t underestimate it. The goal is to start moving without going hard. Your altitude comes later, but your legs get tired now.
More Machame departures, compared
Day 2: Moorland Ascents and the Shira Campsite Tease
Day 2 climbs from about 9,400 ft to 12,500 ft, with 5 km and around 4 to 6 hours hiking time. You leave the rain forest and move into moorland.
The route involves an ascending path where you cross a small valley and follow a steep rocky ridge covered with heather. Then you turn west along a river gorge. That mix of rocky ridge and open terrain can feel mentally different from Day 1. There are fewer “green tunnel” sections and more open stretches where you can judge footing and pace.
You finish at the Shira campsite for dinner and overnight. This stop is valuable for acclimatization because it places you at a higher sleeping elevation before the next push toward the higher volcanic zone.
Day 3: Semi-Desert to Lava Tower, Then Down to Barranco Hut
Day 3 starts at 12,500 ft to 13,000 ft and runs about 10 km for 6 to 8 hours. Habitat shifts to semi-desert, which usually means less moisture in the air and a tougher feel to your breathing if you’re not taking it slow.
From the Shira Plateau you go up a ridge eastward. You pass junctions associated with routes toward Kibo, then shift direction toward the Lava Tower, nicknamed the “Shark’s Tooth.” A little later you reach another junction toward the Arrow Glacier at about 16,000 ft.
Then comes the key twist: after that high point, you continue down to Barranco Hut at about 13,000 ft, where you rest, eat, and sleep.
The big value of this day is not only the scenery, it’s the altitude strategy. You end the day around the elevation you started, but you still get the acclimatization effect of going higher and then descending.
Day 4: Barranco Wall, Karanga Valley, and Camp at Barafu
Day 4 climbs from 13,000 ft to 15,000 ft over roughly 9 km, and you’re looking at 8 to 10 hours hiking time. The habitat is alpine desert, so expect colder air and a drier trail feel.
You leave Barranco and head up a steep ridge, passing the Barranco Wall. Then you reach Karanga Valley campsite, and later connect toward the Mweka Trail. From there you continue up to Barafu Hut, your base for summit night.
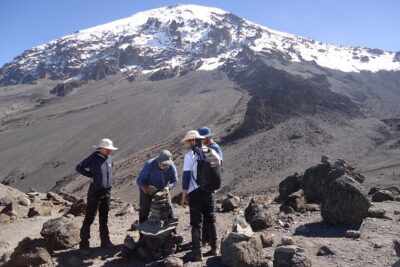
This is the day where your legs can feel the most “finished.” At the same time, you’re building toward something crucial: you get that South Circuit feel and views of Mawenzi and Kibo from the Barafu area. That’s the moment when the climb stops being theoretical and becomes real.
Practical tip: Barafu is where you rest and prepare. Don’t treat it like a “normal camp.” You’re saving energy for midnight onward.
Day 5: Midnight Summit Push, Stella Point Sunrise, and Arctic Conditions
Day 5 is the main event. You go from about 15,300 ft to 19,345 ft, then descend later down to about 10,000 ft. The hiking distances are listed as 5 km ascent and 12 km descent, with total time around 7 to 8 hours (ascent 7 to 8 hours, descent 4 to 6 hours).
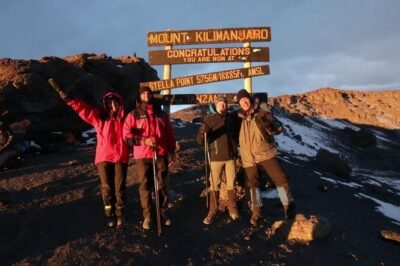
You start very early, typically midnight to 2 am, heading toward the summit between the Rebmann and Ratzel glaciers. The terrain includes heavy scree as you ascend toward Stella Point on the crater rim at about 18,600 ft.
This is the most mentally and physically challenging stretch of the whole trek. It’s not just the altitude. It’s also the rhythm: slow steps, cold fingers, and constant attention on breathing and footing.
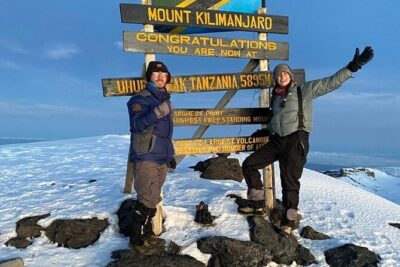
When you reach Stella Point, the payoff is a chance at the most memorable sunrise of your life, weather permitting. From there, the plan continues onward to summit and then you manage the descent portion afterward.
If you take nothing else from this review, take this: you are not trying to “win” the mountain. You’re trying to finish it safely, and your pace decisions earlier in the day matter.
Day 6: Fast Descent Through Rain Forest and Summit Certificates at Mweka Gate
Day 6 drops from about 10,000 ft to 5,400 ft over 10 km in roughly 3 to 4 hours. The habitat returns to rain forest.
After breakfast you descend to the Mweka Park Gate to receive your summit certificates. That piece is more than a souvenir. It’s proof on paper that you completed the trek.
The lower sections can be wet and muddy again, so bring back the same tools you used at the start:
- Gaiters
- Trekking poles
You’ll likely be fine in shorts and t-shirts, but keep rain gear and warmer layers in your daypack. Weather on Kilimanjaro can change faster than you’d expect.
Guides, Porters, and Food: The Support That Makes a Difference
The strongest theme in the reviews is support quality. People specifically highlight guides with strong English and clear communication. Names that come up include Erastus (coordination), Matthew (lead guide), Joshua, Oliver, and Benjamin.
You’ll also benefit from porterage, which is a huge part of why this feels manageable for many hikers. Reviews mention the team helping with small bags when needed and caring for you day to day. That doesn’t eliminate the work, but it changes the load on your body.
Food and camp setup also get positive mentions. People describe meals and facilities as up to standard, with one review calling out a great chef. On summit day, good fuel is not optional, it’s survival.
What to Pack (Without Guessing Your Life Away)
The tour includes camping equipment and cooking support, but you’ll still need to show up ready to handle cold, mud, and altitude. Based on what’s stated, here are the items that matter most:
- Climbing gear rental is available, but confirm sizes and what’s included.
- Sleeping bag rental is available.
- Bring gaiters and trekking poles for muddy sections.
- Plan for rain gear plus warmer clothing for early starts.
- Bath towels are not included, so plan for what you’ll use.
- Personal items and tips are on you.
If you’re unsure about the exact clothing layers, treat it like this: you need comfortable hiking clothes for daytime and a warm plan for night and summit window. And you need rain protection because rain forest days are wet.
Who This Trek Best Fits
This is best for:
- You want a 6-day Kilimanjaro climb with varied habitats.
- You’re comfortable hiking 8 to 10 hour days and dealing with rocky trails.
- You want professional guiding and porterage so you can focus on pacing.
- You want strong camp support and meals included.
If you’re very slow, recovering from an injury, or altitude-sensitive, you might consider a longer option. One review note suggests 6 days is enough if you hike fast, but 7 days helps if you walk slowly. Take that as a pacing warning sign.
Should You Book This 6 Days Machame Route Trek?
Book it if you want a structured, supported climb that balances variety with a realistic schedule. The included meals, camping equipment, porterage, rescue fees, and professional guidance are the kind of value that helps you focus on the climb, not the logistics.
Don’t book it blindly if you hate early mornings or you’re unsure about altitude. Day 5 starts in the midnight-to-2am window and includes heavy scree and a demanding ascent to Stella Point. If that sounds like a nightmare, be honest with yourself and plan your pace, training, and gear.
If you’re choosing between “cheap and chaotic” versus “organized and cared for,” this format leans toward organized. Between the repeated praise for guides like Matthew, Oliver, and Benjamin, and the coordination mentioned with Erastus, you can expect a team that keeps things moving.
FAQ
What route is this tour using on Kilimanjaro?
This trek follows the Machame Route on Kilimanjaro in about 6 days, with camps such as Machame Camp, Shira campsite, Barranco Hut, and Barafu Hut.
Where does the trek start and where does it end?
It starts at Kilimanjaro International Airport, Kilimanjaro Airport Rd, Tanzania and ends back at the same meeting point.
What is the start time listed for the activity?
The start time is listed as 12:00 am.
Is transportation included?
Pickup is offered, and the trek includes a drive of about 50 minutes from Moshi to the national park gate on Day 1.
What meals and accommodations are included?
The price includes accommodation while on trek, plus 5 breakfasts, 5 lunches, and 5 dinners.
What equipment is provided, and what do I need to arrange myself?
Camping equipment is included (mess tent, mattress, and cooking equipment). Climbing gear and a sleeping bag can be rented. Bath towels are not included.
Are park fees or rescue fees included?
Yes. The tour includes parking fees and rescue fees.
What should I do about tips?
Tips are not included, so you should plan for them as a personal expense.
More Machame Departures
- 7 Days Kilimanjaro via Machame route affordable price
★ 5.0 · 110 reviews - 6 Days Climbing Mount Kilimanjaro Machame Route
★ 5.0 · 40 reviews - 7-Day Machame Route Kilimajaro
★ 5.0 · 28 reviews - Mount Kilimanjaro 7 Days – Machame Route
★ 5.0 · 5 reviews - Mount Kilimanjaro 6 days – Machame route
★ 4.0 · 5 reviews
Kilimanjaro, Route by Route
- 7 Days Kilimanjaro via Machame route affordable price
★ 5.0 · 110 reviews - Kilimanjaro Airport taxi to/from Moshi town/Arusha town
★ 5.0 · 60 reviews - 6 Days Climbing Mount Kilimanjaro Machame Route
★ 5.0 · 40 reviews - 8 Days Kilimanjaro Hike via Lemosho Route
★ 5.0 · 39 reviews - 7-Day Machame Route Kilimajaro
★ 5.0 · 28 reviews
Just added from around Kilimanjaro
Kilimanjaro Machame Route, compared.
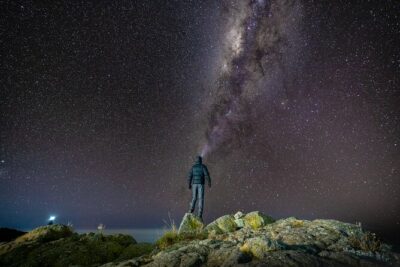 ★ 5.0Kilimanjaro climb, Machame Route (7-day)From $3,377262 reviews
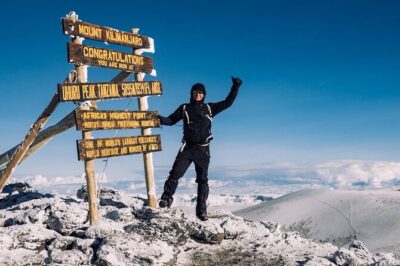 ★ 5.0Climbing Kilimanjaro – Machame RouteFrom $2,322170 reviews
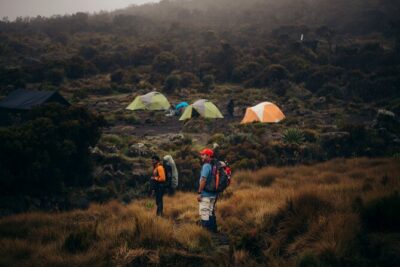 ★ 5.0Climbing Kilimanjaro through 7 days Machame RouteFrom $2,425151 reviews
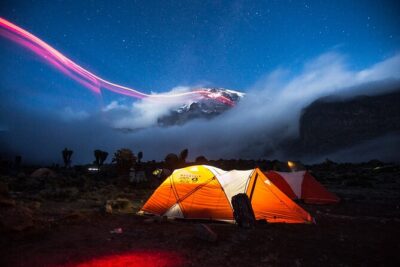 ★ 5.07-Day Machame Kilimanjaro Summit Tour from ArushaFrom $2,695125 reviews
 ★ 5.07 Days Kilimanjaro via Machame route affordable priceFrom $2,400110 reviews
 ★ 4.2#1. Best Kilimanjaro Day hike Tour-Machame Route-ISMANIFrom $11547 reviews
 ★ 5.07 Days Machame route – KilimanjaroFrom $2,85045 reviews
 ★ 5.0The Best of Machame Route in 6 Days: Your World’s Summit GuideFrom $1,15044 reviews
Browse the lists this tour appears in