
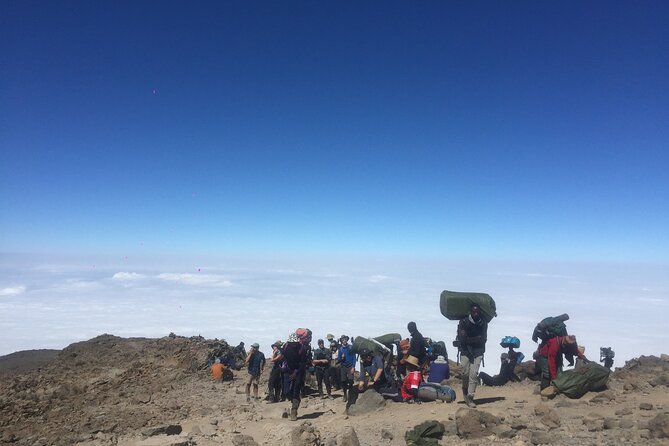
REVIEW · KILIMANJARO MACHAME ROUTE
7 Days Kilimanjaro Climb Machame Route
Kilimanjaro is not a hike, it is a test of patience and lungs. The Machame route earns its Whiskey Route nickname because you get variety fast, plus you sleep in tents the whole way on a climb built for hikers who want the views and the challenge.
I like how this trip is set up to cover major altitude shifts, with five distinct climatic zones, and to keep you moving with structured acclimatization. I also like the practical “feed you and gear you” approach: camping fees, park fees, rescue fees, tents, sleeping mats, meals, and even filtered water are included.
One consideration: Machame is relatively difficult and tent-only camping is not everyone’s idea of a good time. If you want hut beds and a slower, more cushy plan, you may find Machame mentally harder than the easier options.
In This Review
- Key Highlights You’ll Feel On This Trek
- Machame Route, the Whiskey Route, and Who It Fits
- Getting Started in Arusha and Arriving at Machame Gate (Day 1)
- Shira Plateau Climb: From Rainforest Edge to Heath and Open Moorlands (Day 2)
- Lava Tower and Barranco Setup: How Machame Tunes Acclimatization (Day 3)
- Barranco Camp to Karanga Camp: Short Day, Big Wall Energy (Day 4)
- Barafu and the Southern Circuit Finish: Views Toward Mawenzi and Kibo (Day 5)
- Midnight to Uhuru Peak: Stella Point Sunrise and the Cold Truth (Day 6)
- Mweka Descent, Summit Certificates, and Back to Moshi (Day 7)
- Camps, Meals, Filtered Water, and What’s Actually Included
- Team Support and Communication: Where Daniel and John Come In
- Price and Value: What $2,564.11 Covers on Machame
- Practical Advice for a Smoother Machame Climb
- Should You Book This 7 Days Kilimanjaro Climb Machame Route?
- FAQ
- How long is the Machame route trek on this 7-day itinerary?
- Where does the trek start each trip day?
- What kind of accommodation do you use on the mountain?
- What meals and drinks are included?
- What transportation is included for the mountain portion?
- What is not included in the package?
- Is this a private tour?
- What is the cancellation policy?
Key Highlights You’ll Feel On This Trek
- Private guide and private group time, so pacing and questions get handled directly
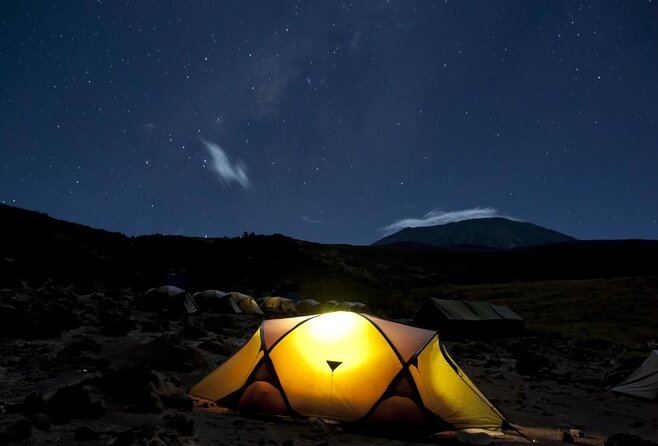
- Whiskey Route style tents-only camping, across several climate zones, from rainforest to arctic conditions
- Solid summit day plan, starting after midnight and pausing at Stella Point for sunrise
- Meals and water are covered, with 3 meals daily plus snacks, filtered water, and coffee or tea
- Moshi hotel before and after, plus transfers to and from the mountain gates
- Team support shows up in real stories, with directors and guides managing communication and logistics closely
Other ways up Kilimanjaro we reviewed
- 8-Day Small-group Lemosho Kilimanjaro Summit Trekking★ 5.0 · 186 reviews
- 7-Day Machame Kilimanjaro Summit Tour from Arusha★ 5.0 · 125 reviews
- Mountain Kilimanjaro Day Hike★ 5.0 · 102 reviews
- 4 days Best experience Kilimanjaro Hike, Serengeti &Ngorongoro★ 5.0 · 54 reviews
Machame Route, the Whiskey Route, and Who It Fits
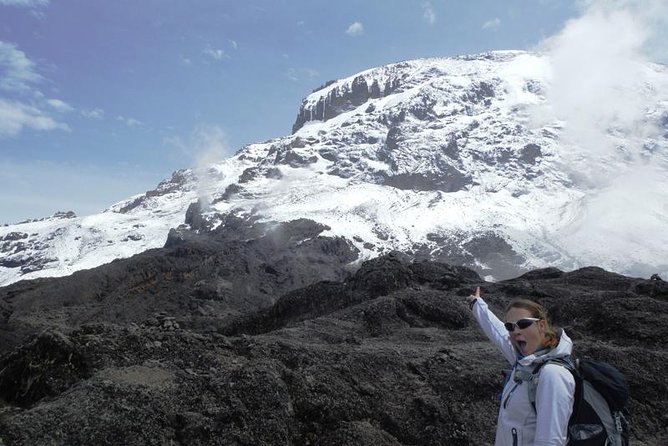
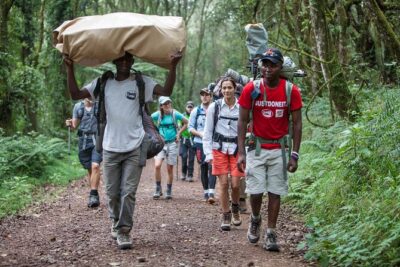
Machame is one of Kilimanjaro’s most popular paths for a reason: the scenery changes a lot, and the route keeps you exposed to big views from different angles. It is also known as the Whiskey Route because it is tougher than the more gradual, hut-based options. On Machame, you earn the view, then you earn the altitude, then you earn the sunrise.
This itinerary is designed for people with some trekking experience and solid fitness. It is not “technical climbing,” but the days still require steady effort, including steep bits like the climb through the Great Barranco Wall area.
The trip uses a 7-day schedule (about 6 days of trekking plus an extra day for acclimatization). That extra time matters because your body needs repeated altitude reminders before the summit push. In practical terms, it can be the difference between feeling tense and feeling ready.
Getting Started in Arusha and Arriving at Machame Gate (Day 1)
You start from Arusha and then drive into Kilimanjaro National Park toward Machame Gate. Day 1 includes a briefing after breakfast, plus a drive of about an hour from Moshi to Machame village at 1,490m. That is where the mountain team packs and organizes your food and gear before hiking begins.
Then comes registration at the gate, followed by the hike to Machame Camp. Expect a long walking day of roughly 7 hours as you work your way from lush, dense rainforest conditions to your first camp experience in tents.
The value of this day is that you are not thrown into a cold, high-altitude scramble immediately. You ease into the rhythm of trekking, camp life, and team routines. The drawback is simple: you still start walking, so you want to show up rested, not drained from travel the night before.
Shira Plateau Climb: From Rainforest Edge to Heath and Open Moorlands (Day 2)
Day 2 is where you start feeling the mountain switch gears. You leave the rain forest glades and climb through an ascending path toward a steep, rocky ridge.
When you reach the Shira Plateau, you pass through heather and open moorlands. You also cross a large river gorge to reach Shira 2 Camp.
Altitude shift is big here, from about 9,350 ft up to 12,500 ft, with a hiking time around 4 to 6 hours and a distance of roughly 5 km. Short enough to manage, tough enough to help you understand how your body reacts at higher elevations.
A practical takeaway: keep your effort small and steady. This is not the day to “prove” fitness. It is the day to learn the pace that keeps breathing controlled.
More Machame departures, compared
Lava Tower and Barranco Setup: How Machame Tunes Acclimatization (Day 3)
Day 3 is built around an important acclimatization pattern. You follow a ridge east, then head southeast toward Lava Tower, a volcanic rock formation rising about 300 feet. After that, you descend to Barranco Camp through the Senecio forest.
You also get a helpful rhythm on paper: you begin and end at around the same elevation, but you spend time higher than your camp altitude. That repeated exposure is one reason Machame’s schedule can feel demanding but still smart.
This day’s altitude range is roughly 12,500 ft to 15,190 ft, then down to about 13,044 ft at Barranco Camp. Hiking time can run 4 to 5 hours for the main section (with the Lava Tower to Barranco leg listed around 2 to 3 hours).
The tradeoff: you are working against both altitude and time. You can feel good early, then fatigue hits as the day adds up. The upside is that the plan is not random, it is designed to prep your legs and your breathing for the next steep-feeling day.
Barranco Camp to Karanga Camp: Short Day, Big Wall Energy (Day 4)
Day 4 is a “short but not easy” day. You start by descending into a ravine at the base of the Great Barranco Wall. Then you climb a roughly 900 ft cliff that is non-technical, but steep.
After the wall climb, you move through hills and valleys and descend sharply into the Karanga Valley. Then you reach Karanga Camp.
The listed elevations are close, from about 13,044 ft to 13,106 ft. Hiking time is not the focus here. The focus is acclimatization plus getting your body comfortable with steep uphill effort after already being above 10,000 ft for days.
If you have knee issues, this is a day to be extra careful with foot placement. Even when the trail is “only” a few hours, steep gradients can stress the same joints you need for the summit descent.
Barafu and the Southern Circuit Finish: Views Toward Mawenzi and Kibo (Day 5)
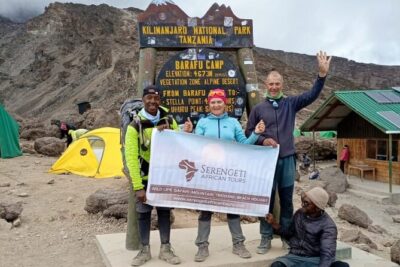
On Day 5, you move from Karanga Camp to Barafu Camp. The route heads toward a junction that connects with the Mweka Trail, and then continues up through a rocky section to Barafu Hut.
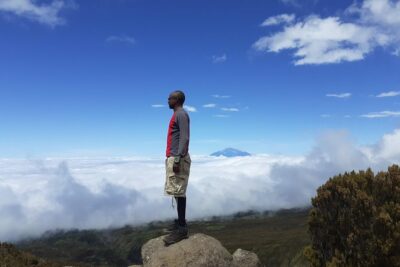
This day marks the completion of the southern circuit. It is also one of the best times for wide views, since Mawenzi and Kibo are described as easily spotted from Barafu.
Altitude climbs from about 13,106 ft to 15,331 ft, with a distance listed around 4 km. It is a smaller distance than some days, but the air feels thinner and the terrain stays rocky.
Why this day matters: it is the day you rest and emotionally switch from “climb mode” to “summit mode.” You are setting yourself up for a midnight start the next day, and your best move is to keep your energy smooth. Avoid big efforts, avoid overeating, and stick to the team’s plan for meals and rest.
Midnight to Uhuru Peak: Stella Point Sunrise and the Cold Truth (Day 6)
Day 6 is the summit day you came for. You start just past midnight and climb toward Uhuru Peak, with the hardest stretch described as the most challenging part due to wind and cold.
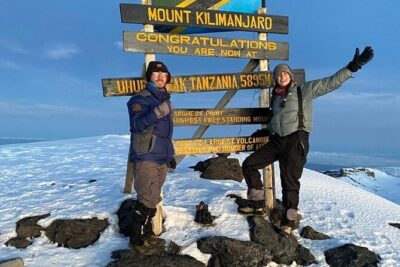
The plan includes short, frequent breaks in the darkness. Once you reach Stella Point at about 18,900 ft, you get a reward: sunrise over Mawenzi.
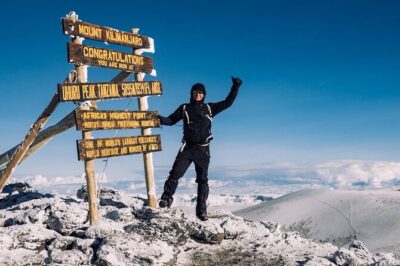
From there, you continue up to the roof of Africa, Uhuru Peak at about 19,341 ft. Then you descend sharply, dropping back toward Mweka Hut Camp, with a brief stop at Barafu for lunch.
This is also where the body gets a different lesson. The trail is rocky, and the descent can stress your knees. The trip specifically notes trekking poles as very helpful in this situation. In my book, poles are not optional comfort gear here. They are joint insurance.
Camp conditions also change fast after summit day. The camp is in the upper forest where mist and rain in the late afternoon are common, so expect wet gear and cold air to be part of the experience. After a final dinner, you rest, because you still have one more walking day left.
Mweka Descent, Summit Certificates, and Back to Moshi (Day 7)
Day 7 is a controlled ending. You descend from Mweka Camp to Mweka Gate, where you collect summit certificates. After that, the route continues about one hour to Mweka Village.
A vehicle from the tour team meets you at Mweka Gate and transfers you back to your hotel in Moshi. The described altitude shift is from about 10,065 ft down to 5,380 ft, with hiking time around 3 to 4 hours.
Weather can play tricks on the final day. The lower reaches can be muddy and wet depending on rain, so you want shoes with real traction and a plan for wet socks.
The good news is that by Day 7 your brain has already done the hard part. You are not negotiating altitude anymore, you are finishing the descent and getting ready to sleep like a normal human.
Camps, Meals, Filtered Water, and What’s Actually Included
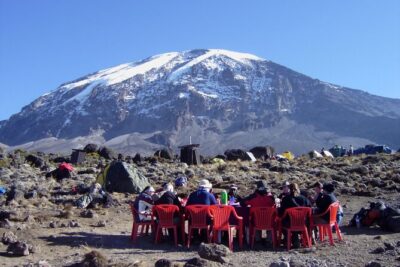
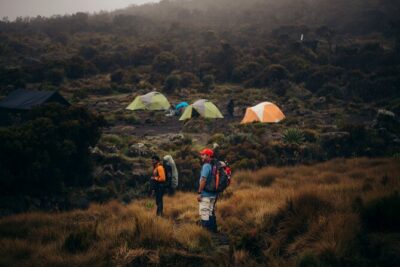
This trip is tent-only on the mountain, with 3 season mountain tents and double layered sleeping mats. That means you will be outside your usual comfort zone, but it also means you are not paying extra for basic camp infrastructure.
Meals are fully included on the mountain: 3 meals daily plus snacks, and you also get coffee and/or tea. Filtered water is provided throughout the trek, plus bottled water.
This matters for value because Kilimanjaro treks often become a constant guessing game: What’s included? What do I need to carry? This program spells it out. You can focus on trekking and hydration, instead of budgeting tiny add-ons every day.
One extra detail to know: a portable flush toilet with a toilet tent is listed as extra for US$65 per toilet plus tent. If you want that convenience, ask early so you are not stuck deciding at camp.
Team Support and Communication: Where Daniel and John Come In
One of the most praised parts of this climb is the team. Many accounts emphasize that the director, Daniel, keeps communication organized and responsive. People also mention message exchanges ahead of time, and that questions are answered quickly rather than being left hanging.
On the mountain, a lead guide named John appears in accounts as part of a skilled team that runs the operation smoothly. There is also a repeated theme that when Day 1 brings rain, the guide and porters handle logistics and care in a way that reduces stress.
That is not a small thing. On Kilimanjaro, calm teamwork is what turns a tough trek into a manageable one. When the crew is organized, you spend less energy worrying and more energy walking.
Because this trip is private, you should also expect more direct attention on pacing, gear management, and timing. You are not sharing your schedule with a crowded group, and you can ask for small adjustments without waiting for a group vote.
Price and Value: What $2,564.11 Covers on Machame
At $2,564.11 per person, you are paying for a full package, not just “a guide and a dream.” The included list is unusually specific, and that specificity is what makes the price feel more fair.
You get park fees, camping fees, and rescue fees. You also get VAT on tour fees and services. On top of that, you get mountain tents, double layered sleeping mats, and transportation to and from the mountain gate.
You are also covered on staffing, including professional mountain guides, cooks, and porters. Food is included with 3 meals daily plus snacks, plus filtered water and bottled water. Before and after the trek, you get hotel accommodation in Moshi and 2-way private airport transfers.
So what are you paying for, really? You are paying to remove the most common scramble points: park costs, camping setup, food planning, and the staff needed to carry, cook, and guide you. That is a strong value proposition if you want the experience to run like an operation, not a DIY expedition.
Your biggest likely extra costs are tips for the crew and any personal items. And if you want the portable flush toilet setup, that is listed as extra.
Practical Advice for a Smoother Machame Climb
Machame is set up with acclimatization moments, like the Shira to Lava Tower to Barranco day that ends around the same elevation it starts, and the Barranco to Karanga day that is short and intentionally steep. Still, your success depends on how you walk, not just the route on paper.
Use the hike days for discipline. Keep the pace steady, take the frequent breaks on summit night, and do not try to outpower the altitude.
Trekking poles are specifically noted as helpful on the rocky descent near the end. If you do not already own poles, borrow or rent before you arrive. Your knees will notice the difference.
Plan for changing weather. Rainforests give way to heather moorlands, then alpine desert, then arctic conditions on summit day. Back down in the upper forest, mist and rain can show up in the late afternoon. Mud and wet ground can happen on the last descent.
Finally, treat your rest like part of the climb. Barafu day is your summit warm-up. Your team will build the schedule around sleep and meals, so follow it instead of improvising.
Should You Book This 7 Days Kilimanjaro Climb Machame Route?
Book this if you want the Machame Whiskey Route experience, with tents-only camping, big habitat variety, and a summit plan that includes Stella Point and a sunrise payoff. The private setup also appeals if you want more direct guidance and personalized pacing.
Skip or reconsider if tent-only camping would stress you more than the mountain itself, or if you are looking for a gentler route with hut-style lodging. Machame is described as relatively difficult and aimed at physically fit hikers, so honesty about your fitness level matters.
If you do book, do one thing before you fly: plan your effort. This trek is not about sprinting to photos. It is about controlled walking on the way up and careful footwork on the way down. When you match the pace to the altitude, Machame can feel like a real adventure, not just a punishment.
FAQ
How long is the Machame route trek on this 7-day itinerary?
The trek takes about six days and five nights for the main climb, and this plan sets aside seven days and six nights for better acclimatization.
Where does the trek start each trip day?
Day 1 drives to Kilimanjaro National Park Machame Gate, then hikes to Machame Camp.
What kind of accommodation do you use on the mountain?
You sleep in tents, specifically 3 season mountain tents, with double layered sleeping mats.
What meals and drinks are included?
On the mountain you get 3 meals daily plus snacks, with filtered water throughout the trek. Coffee and/or tea are also included, along with bottled water.
What transportation is included for the mountain portion?
Transportation is included to and from the mountain gate. There are also 2-way private airport transfers, plus transfers from Mweka Gate back to your hotel in Moshi.
What is not included in the package?
Flights are not included, and tips to the mountain crew are not included. Personal items and laundry services are not included either. A portable flush toilet with a toilet tent is extra at US$65 per toilet plus toilet tent.
Is this a private tour?
Yes. It is a private tour or activity, and only your group participates.
What is the cancellation policy?
Free cancellation is allowed up to 24 hours in advance for a full refund. If you cancel less than 24 hours before the experience starts, you will not receive a refund.
More Machame Departures
- 7-Day Machame Kilimanjaro Summit Tour from Arusha
★ 5.0 · 125 reviews - 6 Days: Hiking Kilimanjaro via Machame Route
★ 5.0 · 24 reviews - 6-Day Guided Tour in Machame Route Mt Kilimanjaro
★ 5.0 · 17 reviews - KILIMANJARO MACHAME ROUTE, (Climb 7days)
★ 5.0 · 16 reviews - 7 days Kilimanjaro climb via Machame route (Whiskey route)
★ 5.0 · 16 reviews
Kilimanjaro, Route by Route
- 8-Day Small-group Lemosho Kilimanjaro Summit Trekking
★ 5.0 · 186 reviews - 7-Day Machame Kilimanjaro Summit Tour from Arusha
★ 5.0 · 125 reviews - Mountain Kilimanjaro Day Hike
★ 5.0 · 102 reviews - 4 days Best experience Kilimanjaro Hike, Serengeti &Ngorongoro
★ 5.0 · 54 reviews - From Arusha/Moshi: Kilimanjaro Hike Marangu Route Day Trip
★ 4.5 · 54 reviews
Just added from around Arusha
Kilimanjaro Machame Route, compared.
 ★ 5.0Kilimanjaro climb, Machame Route (7-day)From $3,377262 reviews
 ★ 5.0Climbing Kilimanjaro – Machame RouteFrom $2,322170 reviews
 ★ 5.0Climbing Kilimanjaro through 7 days Machame RouteFrom $2,425151 reviews
 ★ 5.07-Day Machame Kilimanjaro Summit Tour from ArushaFrom $2,695125 reviews
 ★ 5.07 Days Kilimanjaro via Machame route affordable priceFrom $2,400110 reviews
 ★ 4.2#1. Best Kilimanjaro Day hike Tour-Machame Route-ISMANIFrom $11547 reviews
 ★ 5.07 Days Machame route – KilimanjaroFrom $2,85045 reviews
 ★ 5.0The Best of Machame Route in 6 Days: Your World’s Summit GuideFrom $1,15044 reviews
Browse the lists this tour appears in