
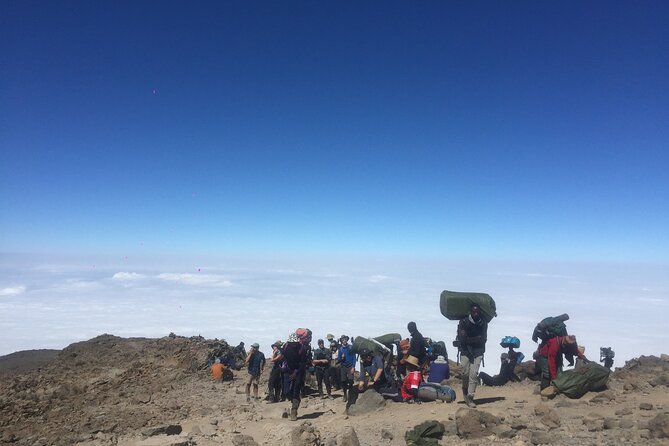
REVIEW · KILIMANJARO MACHAME ROUTE
7 Days Kilimanjaro Climb Machame route
The climb starts in misty trees, then gets real. The 7-Day Machame route takes you through rainforest and moorland into high, wild terrain, with maximum acclimatization and a summit attempt via the famous Barafu route. You get enough time to earn the views, not just rush through them.
I especially like two things. First, the itinerary is built around acclimatization, including key altitude gains and recovery days, so you are not just stacking meters each afternoon. Second, the climb experience is human and well run, with guides such as Mtui, Emmanuel, and Noel plus a team that can include 20+ porters, which means you are supported from camp setup to logistics and pacing.
One drawback to plan for: gear is not included. You will need to budget for mountain gear, trekking pole(s), a sleeping bag, and proper clothes, and the route also asks for a strong fitness level because some sections are steep and the summit hike starts around midnight.
In This Review
- Key things I’d highlight before you go
- Machame’s game plan, and why 7 days matters
- Leaving Moshi and arriving at Machame Gate (Day 1)
- Shira Plateau, the vegetation shift, and the heat check (Day 2)
- The key acclimatization move: Shira traverse to Barranco (Day 3)
- Barranco Wall and Karanga Valley ridge camping (Day 4)
- Barafu Camp: glaciers, alpine desert, and early sleep (Day 5)
- Uhuru Peak at night: Stella Point and the steep-to-steady switch (Day 6)
- The Mweka Gate descent and your certificate moment (Day 7)
- Guides, porters, and the kind of support that changes your day
- Price and what $2,860 really buys you
- Who should choose the Machame route on this schedule
- Should you book this 7-day Kilimanjaro Machame climb?
- FAQ
- Where does the trek start and where do you finish?
- What meals are included during the 7 days?
- What is not included that I should plan to bring?
- What fitness level is required?
- How do summit certificates work on this climb?
- What happens if weather causes cancellation?
Key things I’d highlight before you go
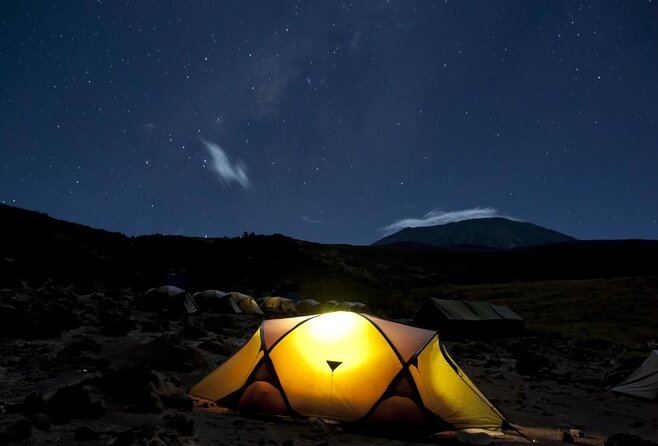
- Machame through cloud forest first: moss-covered trees on Day 1 set the tone, then the vegetation shifts as altitude rises.
- Shira Plateau acclimatization strategy: the itinerary uses the plateau and junction timing to help your body adjust before Barranco.
- Barranco Wall is the hard badge: expect the toughest climbing to be the scrambling day, not the summit day.
- Barafu-to-summit rhythm: dinner early, sleep fast, then a headlamp start around midnight.
- Summit certificates are color-coded: green for reaching Stella Point, golden for Uhuru Peak at 5,895m.
Other ways up Kilimanjaro we reviewed
- 8-Day Small-group Lemosho Kilimanjaro Summit Trekking★ 5.0 · 186 reviews
- 7-Day Machame Kilimanjaro Summit Tour from Arusha★ 5.0 · 125 reviews
- Mountain Kilimanjaro Day Hike★ 5.0 · 102 reviews
- 4 days Best experience Kilimanjaro Hike, Serengeti &Ngorongoro★ 5.0 · 54 reviews
Machame’s game plan, and why 7 days matters
The Machame route is a smart pick when you want variety. You start in rainforest, then you move into moorland, then you climb into higher, harsher terrain where the air feels thinner and the world turns quiet. That change is part of the magic, but it also changes how you should think about pace and hydration.
What makes this 7-day plan valuable is the way it spreads altitude exposure. You are not just chasing the summit on Day 2 or Day 3. You get time for your body to adapt, especially before you transition toward the Shira area and then later when you reach Barranco and Karanga. In practice, that usually means a better chance of finishing feeling like you climbed, not like you survived.
Also, the itinerary is designed for the summit attempt on the most intense timeline Kilimanjaro demands: a midnight start and a long night hike. With this route, you have already done the acclimatization work before that moment.
Leaving Moshi and arriving at Machame Gate (Day 1)
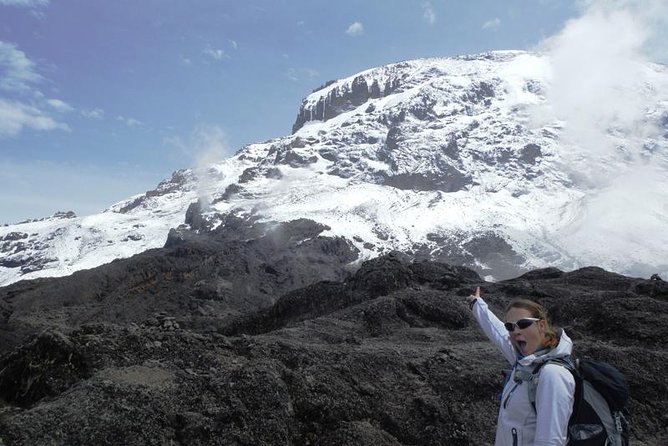
Day 1 begins with a transfer from Moshi to Machame Gate after breakfast. At the gate, you meet your porters and cooks, and the team handles registration. This is a good time to slow down, double-check your pack, and make sure you are wearing layers you can manage as the day warms.
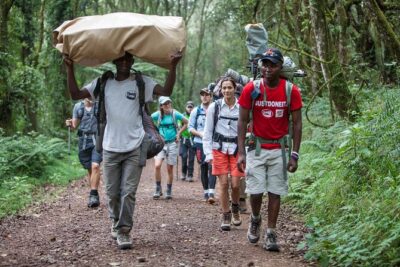
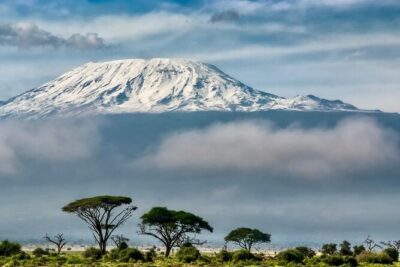
Then you hike toward Machame Camp. The signature experience on Day 1 is the moss-covered cloud forest. The trees are wrapped in moisture, the air feels cool, and the trail can look alive in a way you rarely get at this altitude on most hikes. Toward the end, the forest thins and you transition into heathers, tall grasses, and wildflowers, which is your first “this is Kilimanjaro” signal.
Why it’s worth paying attention to on Day 1: cloud forest hiking can trick you. It looks shaded and easy, so people often move faster than they should. If you want to feel good later, keep your pace steady, sip water, and save your effort for the higher sections.
A practical note: camps are set up by the porters and cooks ahead of you, so you are not spending your energy every evening on logistics. That support is a big part of what you are paying for.
Shira Plateau, the vegetation shift, and the heat check (Day 2)
Day 2 is often called one of the easier days on the Machame route, but it still has uphill sections. The trail can be hot on clear days, especially as you gain altitude. This is where you learn quickly whether you packed enough water habits, not just enough water.
You will pass viewpoints where you can see the plains and forests below, with Kibo and Mawenzi rising above. Then the route starts showing its altitude personality. As the trees diminish in size, you see high altitude plants such as Senecio kilimanjari and Lobelia deckenii. These names are not just trivia. Seeing them tells you you are actually climbing into the zone where the air changes and your body will start demanding better breathing and slower effort.
After lunch, you climb toward the Shira Plateau, formed when Kibo’s lava flows filled the Shira crater. Arriving at Shira Camp, you get a classic orientation moment: Kibo to the west and Mount Meru to the east. It’s the kind of detail that helps you feel where you are on the mountain, not just moving forward blindly.
Potential drawback here: this is a day where you can overheat if you go too hard early. Even when the day feels manageable, stick to a calm rhythm.
More Machame departures, compared
The key acclimatization move: Shira traverse to Barranco (Day 3)
Day 3 is a day that looks like it should be tough on paper, but it is also carefully structured. It ends with only about 110 meters of elevation gain, yet you climb to around 4,530 meters (about 690 meters up) before descending to Barranco Camp. That profile matters because the point is acclimatization, not just altitude numbers.
You start after breakfast and hike through barren terrain, then the itinerary emphasizes a crucial element: hiking east on the Shira Plateau before reaching the junction connected with the Shira and Lemosho routes. This is one reason the schedule is 7 days. It buys you the right kind of exposure at the right time.
If you are feeling strong, you might take a detour to Lava Tower, a 300-foot lava formation jutting out of the mountain. It’s the sort of feature that makes a “barren day” visually interesting, and it helps break up the mental load of steady uphill effort.
By the time you reach Barranco Camp, you have set up your body for what comes next. The next day is the mountain’s attitude test.
Barranco Wall and Karanga Valley ridge camping (Day 4)
Day 4 is the day many climbers remember, mostly because it includes a scramble. After breakfast you head from Barranco Camp to Karanga Valley.
The day begins with about a 1.5 hour scramble up Barranco Wall. In places, you will need your hands to pull yourself up. This is not the gentle, scenic hike day. It is effort and balance.
Once you reach the top, you descend into the greener Karanga Valley. Then the plan places you on the ridge above the valley. That ridge camp choice supports acclimatization because it keeps you from dropping too much in altitude while still letting you recover from the climb.
If you want an easy-to-follow strategy: treat this day like training. Keep your movements controlled on the wall, and do not race the ridge views. Save strength for the higher, colder days that follow.
Barafu Camp: glaciers, alpine desert, and early sleep (Day 5)
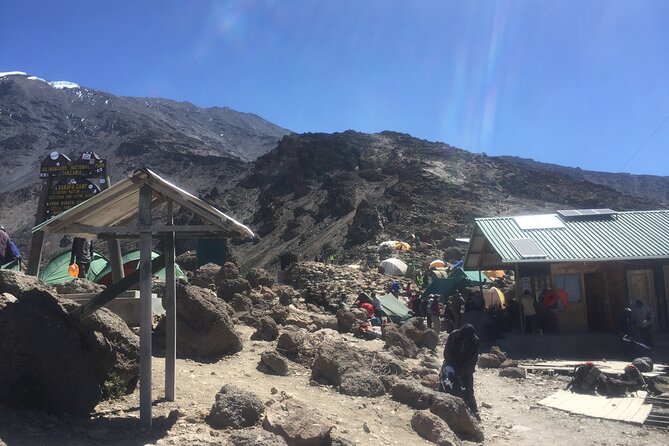
Day 5 starts the push toward summit terrain. You hike to Barafu Camp, and along the way you get a few “wow” moments that are also useful for navigation and mental orientation.
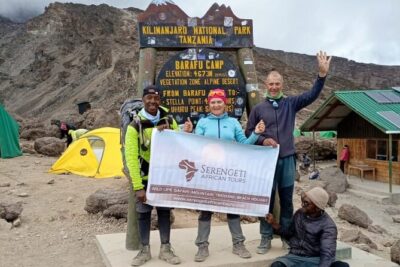
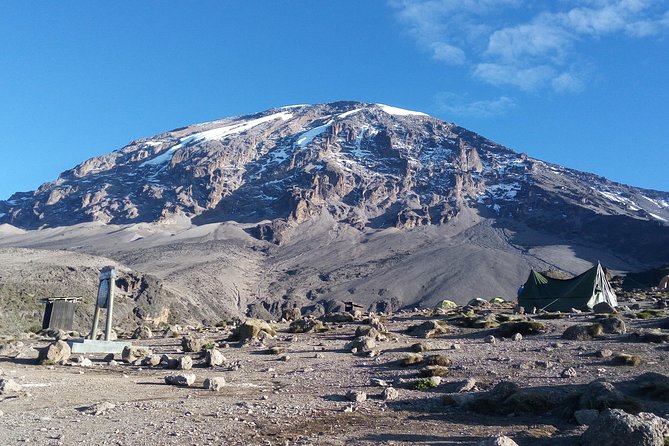
You can see Kibo’s glaciers, plus the junction that links the Mweka descent route with the Machame trail. The path also passes by Heim, Kersten, and Decken glaciers. Then the vegetation drops off and the trail becomes alpine desert with little cover.
That part matters because little vegetation means more exposure. You can feel the cold when the sun dips, and you may feel the sun hard when it comes back. Good layering and sun protection are not optional comforts here, they are part of staying steady.
When you arrive at Barafu Camp, the views of Kibo and Mawenzi peaks are a reward, but the bigger instruction is what comes next: sleep soon after dinner. You will wake before midnight for the summit hike. If you fight sleep, the summit night will feel longer than it already is.
Uhuru Peak at night: Stella Point and the steep-to-steady switch (Day 6)
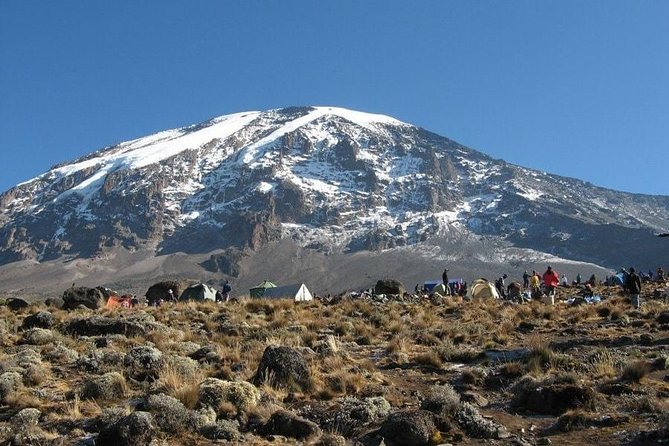
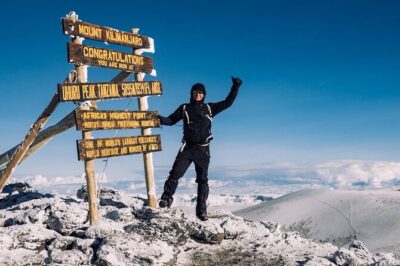
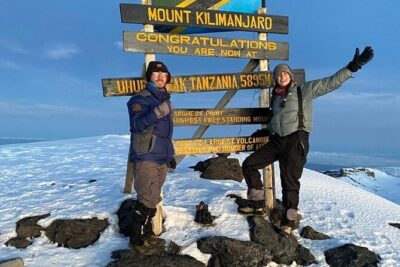
This is the main event. Around midnight, you begin the final ascent to Uhuru Peak at 5,895m. For the next six hours, you hike by headlamp.
The ascent to the crater rim is described as the most challenging part of the entire trek. The trail is very steep until you reach Stella Point, then the climb from Stella Point to Uhuru becomes more gradual. The gradual part is still tiring because altitude makes everything work harder, but it is not the same kind of slope work you did earlier.
The crater rim to Uhuru is about one hour to reach the crater rim. Once you stand at Uhuru Peak, you can take photos and soak in the views, and then you start your descent to Mweka.
What I like about this description is that it sets expectations. Many people think the whole summit day is one constant steep grind. Here, you get a real “steep switch” moment at Stella Point, which helps you pace emotionally. Keep moving until you reach Stella, then adjust your mindset to the slower, steadier final climb.
The Mweka Gate descent and your certificate moment (Day 7)
Day 7 starts with breakfast and finishes with descent to Mweka Gate. The final hiking segment is described as passing through cloud forest again, which is a great way to end the story where you started, even if it feels slower now because you are tired.
Watch your step on the descent. The trail can be slippery, especially with morning conditions. This is one of those days where good footing matters more than speed.
Once you reach Mweka Gate, vehicles wait at the lower station to drive you back to Moshi or Arusha. At the gate you sign your name and details in the registration book, and this is where summit certificates are given.
Here is the color system you should know:
- Reaching Stella Point earns a green certificate
- Reaching Uhuru Peak (5,895m) earns a golden certificate
Then you drive back for downtime, and the plan specifically mentions getting a long overdue hot shower in Moshi. That kind of simple reward after all that altitude is real. You will appreciate it.
Guides, porters, and the kind of support that changes your day
The Machame experience is not only about the mountain. It is also about what happens when you are tired and unsure whether you can keep going at the pace set for your group.
This operator is associated with guiding crews that include Noel, Mtui, and Emmanuel, and one of the consistent strengths is that the team keeps the climb lively and personal. In practice, that can mean songs, language lessons, and local cuisine along the way, which helps you feel connected while you are spending hours moving in the dark or between camps.
The other big support piece is the porter count. In one of the shared climb experiences, the team included 20+ porters. When you have that kind of crew, camp logistics and carried loads tend to be handled so you can focus on walking, breathing, and layering.
If you are the kind of person who gets anxious when plans are unclear, I think you will like that this climb has a clear rhythm: checkpoints at gates and camps, predictable daily transitions, and a team that moves ahead to set camp.
Price and what $2,860 really buys you
At $2,860 per person for a 7-day climb, the price is not “cheap,” but it is also not just paying for trail access. Here is what you are clearly getting based on the plan details:
- Meals included for all days: 7 breakfasts, 7 lunches, 7 dinners
- Admission ticket included (listed throughout the route)
- Pickup offered, with transfers tied to Machame Gate and Mweka Gate
- A guided climb with porters and cooks who set up camps in advance
- Mobile ticket and confirmation at booking time
- Group discounts (when applicable)
- Private tour/activity meaning it is only your group participating
What is not included is also important to factor in. You must bring or arrange mountain gear, trekking poles, a sleeping bag, and clothes. If you have to buy a sleeping bag and full cold-weather layers, your total trip cost can rise fast.
So the value comes down to your situation:
- If you already own the gear, this looks like a fair packaged climb with meals and professional support built in.
- If you need to buy or rent everything at the last minute, you should price that now so the final budget feels controlled.
Who should choose the Machame route on this schedule
This 7-day climb is best for you if:
- You have strong physical fitness and are comfortable with altitude
- You want a route with time to acclimatize, not just a speed run
- You like the idea of shifting terrain, from cloud forest to alpine desert
- You are okay with hard moments, like the Barranco Wall scramble and the steep section on summit night
It might not suit you if you are looking for an easy hiking vacation. This plan includes steep climbs, a midnight summit start, and slippery descent sections at the end.
If you are going with a group, the private format can be a plus. You are not sharing your pacing decisions with strangers, which matters when you are trying to keep everyone breathing at the same tempo.
Should you book this 7-day Kilimanjaro Machame climb?
I would book this if you want a classic Kilimanjaro story told in the right order: rainforest morning, acclimatization structure, then Barranco and Barafu leading you into the summit push. The biggest reason to feel good about booking is the schedule gives you time where it counts, especially before the hardest ascent phases.
I’d pause if you are short on budget for gear, because the plan is explicit that important items are not included. I’d also double-check your willingness for early nights and steep days. If you are okay with that trade, this Machame plan reads like a solid value for a supported, full-week attempt on Uhuru Peak.
FAQ
Where does the trek start and where do you finish?
The climb starts from Moshi, with transport to Machame Gate, then you hike through the route camps until you descend to Mweka Gate. From Mweka Gate, vehicles take you back to Moshi or Arusha.
What meals are included during the 7 days?
Breakfast, lunch, and dinner are included for 7 days.
What is not included that I should plan to bring?
Mountain gear, trekking poles, a sleeping bag, and clothes are not included.
What fitness level is required?
The experience notes that travelers should have a strong physical fitness level.
How do summit certificates work on this climb?
At Mweka Gate you sign in and receive a certificate. Reaching Stella Point earns a green certificate, while reaching Uhuru Peak (5,895m) earns a golden certificate.
What happens if weather causes cancellation?
The experience requires good weather. If it is canceled due to poor weather, you will be offered a different date or a full refund. The experience also allows free cancellation up to 24 hours in advance for a full refund.
More Machame Departures
- 7-Day Machame Kilimanjaro Summit Tour from Arusha
★ 5.0 · 125 reviews - 6 Days: Hiking Kilimanjaro via Machame Route
★ 5.0 · 24 reviews - 6-Day Guided Tour in Machame Route Mt Kilimanjaro
★ 5.0 · 17 reviews - KILIMANJARO MACHAME ROUTE, (Climb 7days)
★ 5.0 · 16 reviews - 7 days Kilimanjaro climb via Machame route (Whiskey route)
★ 5.0 · 16 reviews
Kilimanjaro, Route by Route
- 8-Day Small-group Lemosho Kilimanjaro Summit Trekking
★ 5.0 · 186 reviews - 7-Day Machame Kilimanjaro Summit Tour from Arusha
★ 5.0 · 125 reviews - Mountain Kilimanjaro Day Hike
★ 5.0 · 102 reviews - 4 days Best experience Kilimanjaro Hike, Serengeti &Ngorongoro
★ 5.0 · 54 reviews - From Arusha/Moshi: Kilimanjaro Hike Marangu Route Day Trip
★ 4.5 · 54 reviews
Just added from around Arusha
Kilimanjaro Machame Route, compared.
 ★ 5.0Kilimanjaro climb, Machame Route (7-day)From $3,377262 reviews
 ★ 5.0Climbing Kilimanjaro – Machame RouteFrom $2,322170 reviews
 ★ 5.0Climbing Kilimanjaro through 7 days Machame RouteFrom $2,425151 reviews
 ★ 5.07-Day Machame Kilimanjaro Summit Tour from ArushaFrom $2,695125 reviews
 ★ 5.07 Days Kilimanjaro via Machame route affordable priceFrom $2,400110 reviews
 ★ 4.2#1. Best Kilimanjaro Day hike Tour-Machame Route-ISMANIFrom $11547 reviews
 ★ 5.07 Days Machame route – KilimanjaroFrom $2,85045 reviews
 ★ 5.0The Best of Machame Route in 6 Days: Your World’s Summit GuideFrom $1,15044 reviews
Browse the lists this tour appears in